Tutoriels/Survie du Nether – Minecraft Wiki

Ce didacticiel fournit des conseils de survie utiles lorsque vous vous rendez dans le Nether, que vous souhaitiez simplement y visiter ou y établir une base plus permanente. Ce tutoriel explique également comment battre le jeu en commençant dans le Nether avec rien.
introduction[[[[]
Le Nether est un endroit dangereux, même pour les joueurs expérimentés. Il est rempli d’une multitude de monstres exclusifs que l’on ne trouve pas dans l’Overworld : des flammes hostiles, des squelettes de Wither, des fantômes, des cubes de magma, des hoglins, des piglins et des brutes piglins, et le piglin zombifié neutre, ainsi qu’une foule passive, le strider.
Le terrain est beaucoup plus difficile à naviguer que dans l’Overworld : un faux pas pourrait signifier la mort par la lave enflammée. Les forteresses du Nether et les vestiges de bastions apparaissent tous deux dans le Nether. Les forteresses du Nether sont les demeures des squelettes desséchés et des flammes, et les brutes piglins, piglins et hoglins apparaissent tous dans les vestiges de bastions.
Ce guide est destiné à vous aider à augmenter vos chances de survie dans le Nether et à ouvrir de nombreuses possibilités de jeu telles que le brassage, les hubs du Nether, la Fin et le dragon ender et les boss Wither.
Faire un portail du Nether[[[[]
Pour créer un portail du Nether, le joueur doit créer un cadre rectangulaire d’obsidienne, bien que les coins le fassent. ne pas doit être en obsidienne.
- La taille minimale du cadre est de 5 de haut sur 4 de large, ce qui nécessitera 10 blocs d’obsidienne et produira le portail du Nether “classique” de 3 de haut sur 2 de large à l’intérieur.
- Les coins peuvent être n’importe quel bloc (y compris plus d’obsidienne) ou aucun.
- Le cadre peut être plus grand, tant qu’il est rectangulaire et qu’il n’y a pas d’autres blocs à l’intérieur du rectangle.
- Un portail en ruine peut fournir un cadre partiel au joueur à compléter, mais il devra retirer toute obsidienne qui pleure du cadre, car c’est ne pas un bloc de trame valide.
- La façon “traditionnelle” de créer le cadre consiste simplement à obtenir 10 blocs ou plus d’obsidienne (extraits ou à partir de coffres à butin) et de les placer dans la forme du cadre.
- Alternativement, un cadre de portique peut être partiellement ou complètement “coulé” en place, comme décrit ci-dessous. Ceci est utile si le joueur n’a pas de pioche en diamant.
- Une fois le cadre construit, un pare-feu n’importe où dans le cadre l’allumera et activera le portail lui-même.
- La façon traditionnelle d’éclairer le portail est avec un silex et de l’acier.
- Une charge d’incendie fonctionnera également. Les charges de feu nécessitent un matériau du Nether pour être fabriquées (poudre ardente), mais même dans l’Overworld, elles peuvent être trouvées dans un coffre de portail en ruine.
- En l’absence de l’un ou de l’autre, toute autre source d’incendie fonctionnera ; si des blocs de bois sont placés face au portail (mais pas dans le cadre) la lave peut être utilisée pour mettre le feu à ceux-ci, fournissant le pare-feu nécessaire.
Utiliser de la lave et de l’eau[[[[]
Fabrication de portails “Pas de diamant”.
Un joueur peut lancer une partie ou la totalité du cadre en place, en plaçant des blocs de source de lave et en utilisant de l’eau pour les convertir en obsidienne.
- Cela ne fonctionne que dans l’Overworld, car l’eau ne peut pas être placée dans le Nether, même pas assez longtemps pour convertir la lave. L’eau dans un chaudron va ne pas fonctionnera, et à la fin, les portails du Nether ne fonctionneront pas du tout.
- L’eau n’a pas besoin de couler sur la lave ; tout bloc de source de lave qui trouve de l’eau (source ou coulant) à côté sera immédiatement converti.
- Écoulement la lave se convertira plutôt en pavés, et si la lave s’écoule dans l’eau, elle convertira l’eau en pierre ou en pavés ; si l’un ou l’autre se trouve à l’intérieur du cadre, il devra être retiré avant d’allumer le portail.
- La lave pouvez être transporté dans autant de seaux, mais si une piscine de lave est pratique, seulement un ou deux seaux sont nécessaires, pour aller chercher chaque bloc au besoin.
Méthode de la force brute[[[[]
- Construisez un moule en terre pour le fond : une tranchée 1 de large et 2 ou 4 de long.
- Remplissez chaque bloc de la tranchée à partir d’un seau de lave, puis placez l’eau sur un bloc de moule pour inonder la lave et la transformer en obsidienne (si elle se transforme en pierre ou en pavé à la place, le joueur peut avoir égaré un bloc source. On peut résoudre ce problème en extrayant la pierre ou le pavé et en essayant à nouveau).
- Étendez votre cadre vers le haut et répétez le processus pour mouler les couches suivantes : trois niveaux de deux fosses séparées pour les côtés du portail, puis une autre tranchée pour le dessus.
- Creusez le cadre de terre et allumez le nouveau portail.
Méthode à la volée[[[[]
Il est également possible de placer des blocs sur le côté et d’y “accrocher” de l’eau pour tirer le meilleur parti du cadre. Cette vidéo illustre la technique typique du “speedrun”.
Préparation[[[[]
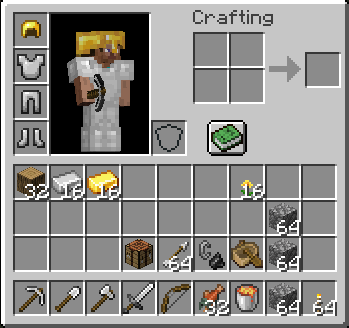
Un inventaire bien préparé
Être bien équipé est essentiel pour survivre dans le Nether. Le manque même d’un objet apparemment inutile dans une situation malheureuse peut vous mettre en danger. Cependant, assurez-vous de ne pas apporter d’objets qui ont peu ou pas d’utilité pour votre objectif, en laissant de la place pour transporter le butin que vous êtes venu chercher dans le Nether en premier lieu, ainsi que pour réduire le nombre d’objets perdus si vous mourez.
Le transport d’articles de secours pour gérer des urgences spécifiques peut prendre plus d’espace d’inventaire que le transport des fournitures minimales pour fabriquer ce dont vous avez besoin au fur et à mesure que la situation se présente, à condition que vous preniez en compte le fait que vous devez être dans un endroit sûr pendant le temps qu’il faut, ou de l’artisanat, une table d’artisanat, puis passez par une ou plusieurs étapes d’artisanat pour obtenir ce dont vous avez besoin. Par exemple, le gravier est commun dans tous les biomes du Nether, à l’exception des deltas de basalte, donc le silex et l’acier peuvent être fabriqués si cela devient nécessaire, à condition que vous transportiez du fer. Il est imprudent de miser sur la recherche de fer, car les seuls moyens d’en trouver sont un butin aussi rare dans les coffres générés ou par le troc. Le même approvisionnement en fer sert au lieu de transporter des pioches, des seaux ou des armes de remplacement, mais pourrait prendre trop de temps à fabriquer dans un seau pour ramasser de la lave inattendue. D’énormes tiges de champignons peuvent fournir des bûches et ainsi fabriquer des bâtons, une table d’artisanat, etc., mais elles ne sont pas aussi polyvalentes que les bûches d’arbres et peuvent prendre un certain temps à trouver si vous êtes dans le mauvais biome. De même, vous pouvez compter sur la recherche de pierre noire plutôt que de transporter du pavé, mais il n’est pas aussi polyvalent et n’est pas aussi facile à trouver que le gravier. Ayez toujours sur vous des bûches, des pavés et du fer, et éventuellement des potions de résistance au feu. Si vous avez beaucoup de fer à revendre, vous voudrez peut-être le transporter sous forme de blocs de fer et apporter des citrouilles ou des citrouilles-lanternes pour construire un golem de fer si vous vous faites assaillir.
Outils et armes[[[[]
L’un des outils les plus importants du Nether, en particulier dans une structure, est votre arme. Une arme de mêlée de fer ou mieux est presque indispensable. Un arc ou une arbalète, ainsi qu’au moins 64 flèches (ou une si vous avez Infinity sur votre arc), suffisent pour éliminer n’importe quel ennemi. Glowstone est commun dans le Nether et permet d’étendre une réserve de flèches décroissante en les transformant en deux fois plus de flèches spectrales,Édition Java uniquement] qui sont bénéfiques en soi. Bien que les armes de mêlée fonctionnent bien dans les combats rapprochés, pensez à apporter une arbalète ou un arc en plus de votre arme de mêlée, car les fantômes et les flammes peuvent être gênants sans elles.
Une ou deux pioches en fer (ou une seule pioche en diamant) peuvent être utiles, car vous pouvez l’utiliser pour dégager un chemin ou pour rassembler des blocs si vous en manquez. Il peut également être utilisé pour creuser un escalier dans le côté d’une forteresse du Nether pour y accéder.
Apportez toujours un silex et de l’acier car même si vous n’avez pas l’intention de construire un nouveau portail du Nether, une boule de feu effrayante peut facilement briser un bloc de portail à l’intérieur du cadre du portail, vous laissant bloqué jusqu’à ce qu’il soit rallumé par le feu d’un silex et d’acier , une charge de feu, des blocs en feu adjacents au cadre du portail ou même une autre boule de feu effrayante. Si vous avez oublié d’apporter un silex et de l’acier, tout espoir n’est pas perdu – vous pouvez négocier avec Piglins pour du fer (ou en trouver un dans un coffre), ou vous pouvez faire une charge de feu à partir de matériaux du Nether (Wither Skeleton pour le charbon, un Ghast pour la poudre à canon, et tuer un blaze pour la poudre de blaze).
Assurez-vous que vos outils ont une durabilité suffisante pour durer assez longtemps pour que vous puissiez atteindre votre objectif.
Armure[[[[]
L’armure est également importante. Même si vous n’envisagez pas de vous battre beaucoup, l’armure réduit la quantité de dégâts que vous subissez en étant immergé dans la lave, ce qui en fait une bouée de sauvetage potentielle si vous tombez accidentellement dans la lave. Un ensemble complet d’armures de fer devrait suffire à augmenter vos chances de survie. Envisagez d’apporter une armure de diamant uniquement si vous avez confiance en votre capacité à survivre (ou si vous jouez en mode Hardcore), sinon vous risquez de mourir et de la perdre. Les boucliers peuvent être utiles pour combattre les squelettes présents dans les forteresses du Nether et les vallées de sable de l’âme. Portez au moins une pièce d’armure dorée pour empêcher les piglins de vous attaquer, car cela vous mérite leur respect.
Transport[[[[]
Les marcheurs peuvent être le meilleur moyen de déplacement dans de nombreuses situations. Si vous avez une canne à pêche et une selle, il vous suffit de localiser un champignon déformé et de vous diriger vers un lac de lave pour attirer un arpenteur. Les cannes à pêche ne se trouvent pas dans le Nether, et la ficelle pour en faire une n’apparaît que dans certains coffres de bastion ou sous forme de goutte de marcheurs tués. Vous avez de meilleures chances de tomber sur une selle dans une forteresse du Nether ou un reste de coffre de bastion, mais si votre plan est d’utiliser un arpenteur pour trouver l’une de ces structures, vous devez avoir apporté la vôtre à l’avance. Tuer les marcheurs en désespoir de cause en tant que source de ficelle tombée pourrait fonctionner, mais ce n’est pas le moyen le plus pratique ou le plus fiable de le faire.
Si vous n’avez pas de selle mais voyez par hasard un piglin zombifié chevauchant un arpenteur, vous pouvez le rapprocher, et idéalement sur terre, en blessant le cavalier avec une flèche (ou même un œuf jeté ou une boule de neige), puis le tuer et prenez le strider pré-selle pour vous-même. Ils pourraient même laisser tomber leur champignon déformé sur un bâton pour vous, mais les chances de le faire ne sont pas élevées. Construire des murs autour de vous avant d’essayer est probablement nécessaire, car les piglins zombifiés de votre région sont susceptibles de devenir hostiles lorsque vous attaquez le jockey strider.
Si jouer sur Édition Java, transporter quelques bateaux peut être très utile. Les bateaux peuvent vous aider à glisser de hautes falaises sans subir de dégâts de chute et à capturer des piglins en colère, des piglins zombifiés ou des endermen se précipitant vers vous. N’oubliez pas que les bateaux ne peuvent pas être fabriqués à partir de types de bois du Nether, vous devez donc apporter des bûches de l’Overworld si vous souhaitez fabriquer plus de bateaux.
Il peut être utile d’emporter de la farine d’os (ou des blocs d’os si vous en avez beaucoup). Lorsqu’elles sont appliquées à des vignes pleureuses et tordues, ces vignes peuvent pousser vers le bas et vers le haut rapidement en quelques clics. Ensuite, le joueur peut grimper dans les vignes comme méthode de transport vertical fiable et réutilisable.
Enchantements[[[[]
Les enchantements offrent d’énormes avantages pour survivre dans le Nether, si vous avez accès à un moyen de les obtenir. Pour votre armement, vous devriez envisager des enchantements augmentant les dégâts sur vos armes (par exemple, la netteté et la puissance). Sachez que tous les monstres du Nether (à l’exception des squelettes, des piglins, des hoglins et des endermen ordinaires) sont immunisés contre les dégâts de feu, donc les enchantements comme l’aspect feu ne devraient pas être une priorité. L’infini est absolument un excellent enchantement d’arc, car il vous permet d’économiser de l’espace d’inventaire pour transporter des flèches, ainsi que le souci constant de les manquer.
Pour les armures, une combinaison de protection et de protection incendie est utile. La plupart des enchantements liés à l’eau tels que Aqua Affinity et Respiration n’offrent aucune utilité dans le Nether; Cependant, Frost Walker vous permet de traverser normalement des blocs de magma sans subir de dégâts, ce qui peut parfois faciliter les déplacements dans le Nether. Enchanter vos bottes avec Feather Falling peut vous sauver la vie en vous permettant de descendre sur un terrain bas de manière plus sûre. Vous pouvez également enchanter vos bottes avec Soul Speed pour traverser les vallées de sable de l’âme à des vitesses plus élevées, car marcher sur le sable de l’âme vous ralentit si vous manquez de cet enchantement ; mais gardez à l’esprit que se déplacer trop rapidement signifie qu’il est plus facile de sortir des rebords (et pire, dans la lave).
Enchanter votre pioche avec Efficiency II vous permet de briser instantanément le netherrack, mais l’exploitation trop rapide du netherrack peut exposer la lave cachée qui s’écoule rapidement et vous engloutit, donc si vous n’avez pas de réflexes rapides, il est recommandé d’utiliser des pioches non enchantées à la place. Les autres enchantements de pioche utiles dans le Nether sont Unbreaking et Silk Touch. Unbreaking peut vous éviter d’apporter plusieurs pioches (mais encore une fois, vous pouvez choisir de vous consacrer à la quantité plutôt qu’à la qualité, et simplement fabriquer de nouvelles pioches lorsque vous en avez besoin). Silk Touch garantit que le minerai d’or du Nether laisse tomber le minerai lui-même, vous garantissant un lingot d’or par bloc de minerai (au lieu de 4 pépites en moyenne avec une pioche non enchantée), ainsi que l’obtention de nylium, utile pour cultiver le bois et le feuillage du Nether.
Blocs[[[[]
En général, les blocs sont pratiques à emporter avec vous dans le Nether. Ils peuvent vous permettre de sauter sur des piliers pour atteindre des endroits élevés, empêcher les foules de vous atteindre et vous permettre de traverser différentes masses de terre au-dessus des océans de lave. Deux ou trois piles de blocs bon marché et ininflammables (par exemple des pavés) devraient suffire pour un voyage normal dans le Nether. Les blocs affectés par la gravité (par exemple du sable ou du gravier) peuvent être utiles pour descendre d’un endroit élevé ; par exemple, du haut d’un pont de forteresse du Nether. Le terrain du Nether est difficile à naviguer, donc apporter ces blocs peut s’avérer très utile. Une pioche peut être utile si vous manquez de blocs, car elle peut être utilisée pour extraire une partie du netherrack abondant.
Apporter 10-14 obsidienne est également une bonne idée, au cas où vous vous perdriez et perdriez votre portail d’origine. Gardez à l’esprit que vous avez également besoin de votre silex et de votre acier pour éclairer ce portail d’urgence.
Fournitures générales[[[[]
La nourriture est aussi importante dans le Nether que partout ailleurs dans le jeu. Si vous manquez de nourriture, vous perdez votre capacité à sprinter et, plus important encore, à régénérer votre santé. En manquer peut être fatal. Pensez à combien de temps vous prévoyez de rester dans le Nether, et combien de combats vous pourriez faire, et apportez une quantité appropriée de nourriture pour cela. Gardez à l’esprit que différents aliments fournissent différentes quantités de saturation, ce qui est la chose la plus importante pour la guérison. Plus un aliment est saturé, plus vous régénérez votre santé en le mangeant. Le steak et les côtelettes de porc sont parmi les meilleurs aliments pour les débuts de jeu, le pain, le mouton et le saumon cuit étant des alternatives acceptables.
Le ragoût de champignons est également une bonne option, qui peut être fabriqué à partir de champignons et de « bois » trouvés dans le Nether. Apporter quelques fleurs appropriées de l’Overworld vous permet de mettre à niveau cela vers un ragoût suspect. L’utilisation de marguerites oxeye fournit 7 secondes de régénération, ce qui peut vous sauver la vie si votre santé est faible avec des ennemis à proximité ou si vous avez été atteint de Wither à la suite d’un combat. avec un squelette flétri. Un ragoût suspect fabriqué à partir de pissenlits ou d’orchidées bleues fournit beaucoup plus de saturation que les aliments ordinaires, qui peuvent également être utilisés pour soigner beaucoup de santé en peu de temps. Cependant, il convient de noter que le ragoût ne peut pas être empilé et que même les ingrédients prendront trois (ragoût de champignons) ou quatre (avec une fleur) emplacements d’inventaire. Envisagez d’apporter environ une demi-pile de nourriture « ordinaire », en plus des ingrédients susmentionnés qui peuvent être transformés en ragoût suspect selon vos besoins. Utilisez la nourriture habituelle pour maintenir votre faim et le ragoût comme méthode de régénération rapide de la santé dans des situations dangereuses.
Les sources de nourriture dans le Nether sont rares mais existent, telles que les côtelettes de porc laissées par les hoglins et les champignons rouges et bruns qui peuvent être trouvés éparpillés dans tout le Nether. Cependant, ces sources de nourriture sont généralement difficiles à trouver de manière cohérente, alors ne vous attendez pas à pouvoir vous nourrir sans apporter de la nourriture de l’Overworld.
Si vous avez déjà exploré le Nether et obtenu des baguettes de feu, et pouvez ainsi préparer des potions, vous devriez le faire. Les potions de résistance au feu sont très précieuses dans le Nether, car tomber dans la lave est toujours une possibilité. Les éclaboussures de potions de guérison peuvent également vous sauver la vie si vous vous retrouvez en mauvaise santé au combat, comme le ragoût suspect (mentionné ci-dessus). Si vous avez prévu à l’avance et apporté un ou plusieurs seaux d’eau, suffisamment de fer pour faire un chaudron (vous pouvez mettre de l’eau dans un chaudron pour vous éteindre (édition Java uniquement), des bouteilles et des pavés ou de la pierre noire (pour fabriquer des stands de brassage) , avant de chercher une forteresse du Nether, vous pouvez y trouver tout ce dont vous avez besoin pour commencer à préparer des potions, vous mettant dans une position beaucoup plus forte. Quelques piles de torches peuvent fournir un moyen de laisser une trace, vous permettant de retrouver votre portail si vous la perdez (bien que, dans ce cas, l’utilisation de coordonnées soit souvent une solution plus pratique.) N’oubliez pas que les boussoles ne fonctionnent pas dans le Nether, alors n’en apportez pas une avec l’intention de l’utiliser pour retrouver votre chemin à moins qu’elle Les torches sont également utiles pour marquer les parties d’une forteresse du Nether que vous avez déjà visitées, ainsi vous perdez moins de temps à explorer les zones de la forteresse du Nether que vous avez déjà épuisées.
Une petite poignée de seaux vides peut être utile pour éliminer la lave dans des endroits difficiles. Ils peuvent également vous sauver la vie si vous rencontrez l’un des nombreux blocs de lave en creusant dans le netherrack.
Les perles d’Ender peuvent être extrêmement utiles si vous tombez dans la lave. Ils sont également utiles pour traverser des fosses de lave ou atteindre des zones autrement difficiles d’accès. Cependant, vous devez considérer que les perles de fin sont relativement difficiles à obtenir et vous voudrez peut-être les conserver pour activer le portail de fin plus tard (si vous ne l’avez pas déjà fait). Il existe deux façons simples d’obtenir des perles ender dans le Nether : tuer des endermen qui se reproduisent abondamment dans les forêts déformées ou échanger avec des piglins, ce qui peut vous donner presque une pile de perles ender.
Les lingots d’or peuvent être utiles pour faire du troc avec les piglins (ainsi que pour les distraire s’ils sont en colère contre vous) si vous visitez les déserts du Nether ou la forêt cramoisie. Vous pouvez obtenir des objets utiles comme des potions de résistance au feu, des perles d’Ender, de l’obsidienne et de l’obsidienne pleurante. Si vous avez plus d’une pile de lingots d’or, vous pouvez les stocker sous forme de blocs d’or. Attention à ne pas laisser tomber de blocs d’or, car les piglins les ramassent et sans rien vous donner en retour.
Netherrack peut être acquis dans l’Overworld à partir de portails en ruine. Cela peut être fondu et les briques du Nether résultantes transformées en une clôture en brique du Nether. Trois piles de netherrack donnent exactement une pile complète de clôtures. Étant donné que les clôtures en brique du Nether sont résistantes aux explosions et peuvent également être vues à travers, elles constituent une bonne option pour les fenêtres et/ou les périmètres lors de la construction de votre premier abri autour de votre portail. Une façon rapide de faire cette recette est la suivante :
- Vérifiez votre compte. Si vous avez 3 piles égales, mettez de côté 12 morceaux de votre netherrack et remettez-le dans votre poitrine. Alternativement, vous pouvez ajouter 6 pièces pour remplir une recette supplémentaire.
- Faites fondre votre netherrack en briques ; l’utilisation de trémies ou de plusieurs fours rend cela plus pratique.
- Répartissez les briques uniformément sur les carrés d’une table d’artisanat, créant ainsi 9 piles de 20 (ou 22) briques. Prenez l’une de ces neuf piles et remettez-la dans votre inventaire, puis combinez les 8 autres piles par paires dans la recette 2×2 pour les blocs de briques du Nether. Fabriquez le lot de ces (40 ou 44 recettes) avec un shift-click.
- Maintenant, vous pouvez simplement organiser les briques et les blocs enregistrés en 10 (ou 11) recettes. Si vous optez pour la 11e recette, vous vous retrouvez avec une pile complète et 2 clôtures supplémentaires.
Entrer dans le Nether[[[[]
Alors que le paysage du Nether est captivant, n’oubliez pas que le Nether est un endroit dangereux. Pour la première visite du joueur, les principales menaces sont la chute, le feu, la perte, les hoglins et les fantômes. Les deux premiers peuvent être traités de la manière habituelle, mais les menaces les plus urgentes sont très probablement les ghasts puis les hoglins en raison du fait que les autres dangers ne bougent pas ou ne tirent pas sur le joueur, à l’exception des piglins (bien qu’ils n’attaquent pas un joueur portant au moins une pièce d’armure dorée qui n’attaque pas ou n’ouvre pas de conteneurs.) Cela dit, ne soyez pas négligent ; Les chutes et les trous soudains peuvent être difficiles à repérer dans le paysage déroutant du Netherrack. Le feu dans le Nether est plus dangereux que dans d’autres dimensions, car l’eau ne peut pas y exister ou y être placée. Les cubes de magma sont également une menace compte tenu de leur armure naturelle et du fait qu’ils se multiplient comme des boues, bien que les plus petits infligent toujours des dégâts.
Lorsque vous arrivez pour la première fois au Nether, restez dans le portail jusqu’à ce que les morceaux autour de vous se chargent afin que vous puissiez voir à quoi ressemble la zone environnante immédiate. Souvent, un portail du Nether se génère juste à côté d’un lac de lave géant ou d’un tombant élevé. Si tel est le cas, sortir du portail du Nether à l’arrivée entraînera probablement la mort.
Décalage[[[[]
Avec un ordinateur plus lent, le joueur peut rencontrer un énorme pic de décalage en entrant dans le Nether. La solution de contournement consiste à effectuer les opérations suivantes : une fois que le joueur est sorti du portail, activez le F3 informations de débogage, puis Esc pour mettre le jeu en pause. Notez la ligne “Chunks Updated” – même en pause, le jeu continue de charger des morceaux et de les mettre à jour. Il est sage de noter également les coordonnées du portail. Le joueur peut alors attendre que les mises à jour de morceaux tombent à zéro, ce qui signifie que le jeu a fini de charger la région qui les entoure. Ensuite, le joueur peut reprendre la lecture. Cette astuce est également utile lorsque le joueur modifie sa distance de rendu.
Protéger le portail[[[[]
Même si la chasse, l’exploration et l’exploitation minière peuvent sembler amusantes, il n’est pas sage de commencer à le faire dès que le joueur entre dans le Nether pour la première fois. La première tâche du joueur est de construire un abri pavé autour du portail. La brique, la pierre et d’autres blocs résistants aux explosions fonctionnent également, mais le pavé est le moins cher dans l’Overworld. Comme indiqué ci-dessus, les clôtures en briques du Nether peuvent être fabriquées avant même d’entrer dans le Nether (en exploitant des portails en ruine pour le Netherrack), et elles sont à la fois transparentes et résistantes aux explosions.
Regardez autour de vous le plus rapidement possible, juste assez pour voir sur quel type de terrain le joueur construit, puis commencez à construire aussi vite que possible. Malheureusement, un premier portail a une chance disproportionnée de sortir à côté d’un abysse, d’un lac de lave ou d’un mur de Netherrack, et même s’il apparaît à l’air libre, il peut y avoir plusieurs fantômes en vue.
- Si la situation est clairement impossible, abandonnez le portail d’origine, trouvez un endroit plus sûr et construisez un portail de retour ! La lave inondant le portail ou plusieurs fantômes qui vous attendent peuvent forcer cela. Vous devez également obtenir les coordonnées de votre portail, les mêmes que celles décrites pour “Lag” ci-dessus.
- Premièrement, si votre portail est apparu sur le sable de l’âme, vous avez immédiatement besoin d’un sol qui ne vous ralentit pas. En fonction de la quantité de pierre que vous avez apportée, vous devrez peut-être raréfier les murs, en les remplissant de clôtures en bois qui bloquent au moins la vision de la foule.
- Sinon, vous devriez commencer par les murs, en lançant suffisamment de pierres pour bloquer les boules de feu effrayantes.
- Le joueur peut se retrouver sous le feu des fantômes dès son entrée dans le Nether. Ne paniquez pas, concentrez-vous simplement sur la construction d’un mur entre le joueur et le fantôme, en faisant rebondir les boules de feu pour éviter trop de dégâts. Après avoir terminé le combat ou au moins trouvé un abri, rallumez le portail au besoin, puis étendez le mur autour du portail.
- Si vous êtes à côté d’une chute soudaine ou d’une lave, commencez par le mur qui vous en protège.
- Si vous êtes à côté d’un mur de Netherrack, vous pouvez construire un abri initial contre celui-ci, mais attendez-vous à y mettre aussi des pavés – espérons-le lors d’une visite ultérieure, mais si des boules de feu effrayantes pénètrent, une partie de ce mur peut disparaître (pas pour mentionner être en feu).
- Si par hasard le joueur se retrouve avec un portail flottant au-dessus de la lave, fixez la couche inférieure à l’extérieur des blocs de rebord et faites juste assez pour abriter le joueur pendant qu’il commence un pont pour atterrir où le joueur peut faire un portail de retour.
- Vous avez besoin d’au moins deux piles de pavés pour les murs et le plafond, et le sol et les autres garnitures peuvent coûter une autre pile. Parce que vous êtes juste à côté du portail, n’hésitez pas à retourner dans l’Overworld pour plus de pavés si nécessaire.
- Si votre portail explose, ne paniquez pas. Du silex et de l’acier, des boules de feu ou de l’obsidienne supplémentaire sont tout ce dont vous avez besoin pour le rallumer. Si vous avez une boussole et une magnétite, vous pouvez également l’utiliser.
Votre abri doit mesurer au moins 5 blocs de haut, mais le portail lui-même peut faire partie du toit. Bien qu’il soit tentant de faire la même chose avec un mur, il est probablement plus sûr de pouvoir contourner le portail des deux côtés. Utilisez des barres de fer pour les fenêtres. Assurez-vous de laisser suffisamment d’espace pour une table de bricolage et un coffre ou deux. Les coffres sont importants si le joueur ne veut pas perdre trop d’objets à chaque fois que vous mourez. N’oubliez pas non plus la porte – le bois suffit jusqu’à ce que vous trouviez où un bouton ou un levier extérieur pourrait être placé à l’abri des boules de feu. Notez que si le joueur construit contre un mur de netherrack, vous avez besoin d’un mur arrière en pavés devant celui-ci. Si vous voulez y creuser plus tard, vous pouvez toujours y mettre une porte. Une fois que le joueur a relevé les murs et le plafond, couvrez ou remplacez également le sol par des pavés, en l’étendant sous les murs. Les murs doivent s’étendre d’un bloc au-dessous du niveau du sol et un peu plus loin sous les portes. L’abri a également besoin de quelques blocs de sol pavé à l’extérieur des portes, au cas où un fantôme tirerait sur le joueur pendant qu’il entre ou sort. Vous devriez vous retrouver avec un espace complètement entouré de pavés, de fer et peut-être d’un peu d’obsidienne.
Assurez-vous de savoir dans quel biome vous vous trouvez :
- Forêt cramoisie : faites attention aux hoglins, car ils infligent des dégâts et des reculs importants et peuvent vous projeter dans les airs. Cependant, comme les porcs, ils laissent tomber des côtelettes de porc lorsqu’ils sont tués. Les piglins sont des ennemis redoutables qui apparaissent fréquemment ici, et ils attaquent les joueurs qui ne portent pas d’or. Ils deviennent également hostiles envers ceux qui ouvrent des coffres, des coffres, des barils ou d’autres conteneurs, ou détruisent des objets liés à l’or comme des blocs d’or, des minerais ou de la pierre noire dorée. Ces foules troquent, vous pouvez donc obtenir de l’obsidienne qui pleure et des potions de résistance au feu.
- Forêt déformée : les Endermen apparaissent souvent ici, alors assurez-vous de construire avec des blocs qu’ils ne peuvent pas ramasser. Faites des plafonds de deux blocs de haut pour qu’ils ne puissent pas se téléporter ou apparaître à l’intérieur. Parce que les ghasts, les cubes de magma, les piglins, les hoglins et la plupart des autres monstres du Nether n’apparaissent pas ici, c’est probablement le biome le plus sûr où rester.
- Deltas de basalte : Construire ici est un véritable défi grâce aux poches de lave, aux blocs de magma et au basalte qui apparaissent sur le sol, ainsi qu’aux piliers et pointes inégaux. Il faut aussi faire attention aux cubes de magma, qui infligent de gros dégâts, même les plus petits, et quelques reculs.
- Soul Sand Valley : Vous devez changer le sol du soul sand et du sol pour éviter d’être ralenti. Méfiez-vous des fantômes et des squelettes : ils apparaissent le plus souvent ici, et le terrain naturel peut vous ralentir.
- Déchets du Nether : Lisez les informations ci-dessus pour protéger le portail. Des piglins, des cubes de magma et des ghasts apparaissent ici, mais c’est un bon endroit pour trouver du quartz car il n’est masqué par aucun nylium.
- Forteresse du Nether : bien que ce soit un endroit chanceux pour frayer, vous devez bien protéger le portail. Assurez-vous que le plafond a une hauteur de 2 blocs pour éviter que des squelettes de Wither n’apparaissent là-bas. Assurez-vous de bien l’allumer, car les incendies peuvent apparaître à des niveaux de lumière plus élevés que la plupart des foules hostiles, et ils envoient des appels d’alarme lorsqu’ils sont attaqués. Cependant, vous avez un accès immédiat à ce pour quoi la plupart des joueurs viennent dans le Nether : des tiges de feu et des crânes de squelette de dépérissement, ainsi qu’un butin de forteresse généré naturellement.
- Bastion Remnant: Bien que légèrement moins chanceux, vous avez accès à des géniteurs de cubes de magma et à une base partiellement aménagée. Méfiez-vous des brutes piglin : elles ne sont pas dupes des armures en or, ont une santé élevée et des attaques puissantes. Les piglins vous attaquent si vous attaquez une brute. Voir Tutoriels/Vaincre un reste de bastion pour savoir comment obtenir les grandes quantités de blocs d’or qu’il contient.
Plus tard, vous pouvez commencer à faire de belles maisons et de plus grandes bases dans le Nether, mais pour l’instant, un abri de galets avec le portail, un coffre et une table d’artisanat est suffisant. Les seules nécessités sont une armure de fer, une pioche, une épée et une pelle (tout en fer), de la nourriture, un arc et des flèches, des pavés pour faire des abris rapides, de la terre ou du gravier pour sauter des piliers ou arrêter la lave, et votre fidèle silex et acier. Le reste des objets ou des fournitures supplémentaires peuvent être stockés dans les coffres. Si le joueur parcourt une certaine distance, apportez suffisamment d’obsidienne pour créer un portail d’urgence.)
Pour empêcher les monstres d’apparaître dans la maison/base du Nether du joueur, on peut utiliser des objets transparents ou des demi-blocs comme sol. Cependant, sachez que des monstres peuvent apparaître sur le portail du Nether lui-même. Maintenant que votre portail du Nether est sécurisé, le joueur peut commencer à faire ce pour quoi il est venu dans le Nether !
Cas spéciaux[[[[]
- Si le portail du joueur émerge flottant au-dessus d’un lac de lave, le portail génère quelques blocs supplémentaires de rebord au fond, mais il est toujours recommandé de le construire dans une plate-forme, puis de continuer à construire un chemin vers la sécurité. En atteignant un endroit plus sûr, le joueur peut y construire un abri et un nouveau portail de retour à l’intérieur. Désactivez l’ancien portail avant que le joueur ne commence à utiliser le nouveau afin que le portail de l’Overworld soit lié au nouveau.
- Si vous faites face à une situation impossible et que vous mourez sans pouvoir désactiver l’ancien portail ou en créer un nouveau, vous devrez peut-être revenir en arrière et réparer les choses à la dure.
- J’espère que vous avez les coordonnées du côté inférieur du portail. Si votre portail était dans les airs, contre une falaise ou dans une autre situation délicate, il est probable que les coordonnées auxquelles votre portail d’origine “aurait dû” se rendre aient été bloquées par de la lave et/ou de grandes masses de netherrack. Multipliez les coordonnées du portail du Nether par 8 pour voir où se trouve son emplacement de correspondance “naturel” dans l’Overworld, et comparez-le aux coordonnées réelles de votre portail d’origine dans l’Overworld. S’ils sont radicalement différents, l’espace entre les deux représente probablement le danger qui vous a bloqué.
- Pour obtenir un portail vers un nouvel endroit dans le Nether, vous devez parcourir au moins 1000 pâtés de maisons à partir de l’emplacement correspondant où se trouve le portail. en fait est sorti, et créez votre nouveau portail là-bas. La question suivante est, quelle direction? Si vous revenez vers et au-delà de votre portail d’origine, votre nouveau portail peut sortir de l’autre côté du danger qui a bloqué le portail d’origine, et vous devez y retourner pour le mettre hors service. Ainsi, vous feriez mieux de vous éloigner de votre portail d’origine et de plus de 1000 blocs au-delà de l’endroit où le portail inférieur que vous avez obtenu aurait correspondu. Avec de la chance, cela pourrait vous amener à un meilleur emplacement dans le Nether. En plus de remplacer votre ancien équipement, cette escapade nécessite à peu près la même préparation que la première, y compris les pavés et l’obsidienne.
- Une fois de retour dans le Nether dans un endroit plus sûr : d’abord, voyez si vous pouvez effectuer une course rapide pour récupérer les objets survivants, en les renvoyant vers votre nouveau portail si nécessaire (si cela semble dangereux ou si tout est parti dans la lave, oubliez ça et recommencez). Construisez un abri pour votre nouveau portail, retournez vous réapprovisionner en pavés, puis retournez là où se trouvait l’ancien portail. If the location turns out to be salvageable, you may be able to just build a shelter and continue, otherwise:
- If the old portal hasn’t been broken by ghasts, decommission it by mining a block. Now, scout out a Nether location which comes out someplace more reasonable, as close as possible to your base. You may even be able to make a better location, by building a platform over lava or tunneling into a netherrack mass to get within 16 blocks of your base portal’s “natural” coordinates. Now, you can build your new shelter first, then put your return portal inside.
- J’espère que vous avez les coordonnées du côté inférieur du portail. Si votre portail était dans les airs, contre une falaise ou dans une autre situation délicate, il est probable que les coordonnées auxquelles votre portail d’origine “aurait dû” se rendre aient été bloquées par de la lave et/ou de grandes masses de netherrack. Multipliez les coordonnées du portail du Nether par 8 pour voir où se trouve son emplacement de correspondance “naturel” dans l’Overworld, et comparez-le aux coordonnées réelles de votre portail d’origine dans l’Overworld. S’ils sont radicalement différents, l’espace entre les deux représente probablement le danger qui vous a bloqué.
If the portal gets blasted[[[[]
The player’s first resource should be their flint and steel. If for some reason the player does not have one, relighting the obsidian portal frame becomes much more difficult. If the portal was exposed enough to get hit by a ghast fireball, the player could persuade a ghast to hit it with another fireball by getting into the line-of-sight long enough to shoot the fireball. If the player dodges the fireball quickly enough and it hits the obsidian of the portal, the portal gets re-lit.
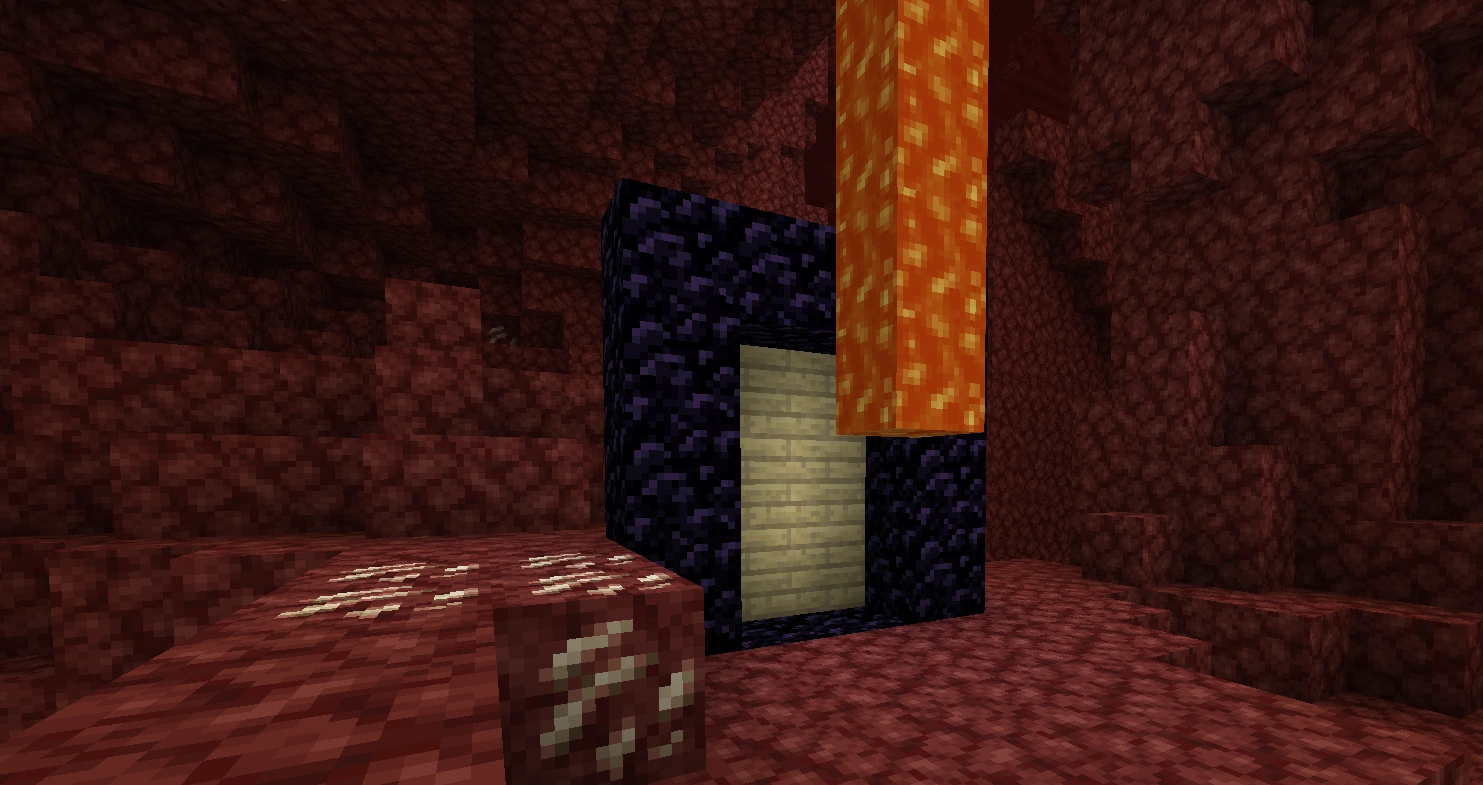
Using wood and lava to light a portal.
Another possible method is to take any flammable block and place it on one side of the block. By getting lava close to the flammable blocks, the lava can eventually light the wood, thus lighting the portal frame. Having the lava right on the opposite side of the frame of the flammable block is the fastest method. Also, the higher the difficulty, the faster the blocks catch on fire, so this method is more difficult in Easy or Peaceful difficulties. If the player also lacks a bucket, one can channel lava past the portal, or even build a trail of flammable blocks (planks are cheap, but wooden slabs are cheaper) to the nearest fire. That last method is especially tricky, as fire doesn’t always catch. If this happens, try making it wider than one block.
A new set of flint and steel can be acquired. Looking in nether fortresses or ruined portals, there is a chance of finding a flint and steel in a chest. Also, gravel occurs naturally in the Nether, so a player can collect flint from there. Iron nuggets can be bartered from piglins, even or made from smelting down armor or tools. This process requires having a furnace and fuel source (such as a bucket of lava). Iron nuggets can also be obtained from bartering with piglins.
Another option is to create a fire charge. This is trickier as it requires gunpowder, coal, and blaze powder, so the player may have to kill a ghast, wither skeleton and blaze to collect all three of these items. Fire charges work just like flint and steel, except each use uses up one item. Fire charge may also be found in ruined portal chest. Fire charges can also be obtained from bartering with piglins.
As a last resort, if the player has (or can make) a chest or two (they appear in nether fortresses, so you might be able to locate one), the player can stuff all their equipment into the chests (not forgetting armor), and then commit suicide. However, you lose your XP levels if you do this. Assuming the player is not playing on hardcore and has not used a respawn anchor, they respawn in the Overworld, and can re-equip themselves at leisure (this time, not forgetting the flint and steel) before going back through the portal to collect their items. Note that this is more difficult on a multiplayer server because another player can come by and steal your items. If you have previously brought blaze rods back to the Overworld, you might even be able to use an ender chest, which can let you stash your stuff and pick it up back home from another such chest.
Additionally the player if holding a diamond pickaxe can break a block of the portal replacing it after and relighting the portal.
Fending off ghasts[[[[]
Ghasts are one of the hardest and most annoying mobs to fight in Minecraft, mainly because of their floating ability and their long-ranged fireball, which does considerable damage to both players and the landscape. If you are bridge-building across a lava sea, they might shoot you off. (One direct hit can kill an unarmored player.) That said, they do have several weaknesses:
- They do not actually chase the player (nor flee), even after being attacked. They just move randomly around the landscape, firing at any player who comes into the line of sight (and range).
- Also, ghasts have 10 points of health (two fully charged shots with an unenchanted bow), so sniping them is not too difficult. A bow enchanted with even Power I or a critical hit can one-shot them.
- The fireballs are fairly easy to dodge, but they also tear up the landscape, not to mention setting it afire. However, the player can also bounce a fireball away by hitting it (fist, weapon, tool, anything works) as comes near. The fireball usually goes in the direction of the player’s gaze. If the player manages to hit the ghast with its own fireball, it dies instantly, awarding the player the “Return to Sender” achievement/advancement. Be forewarned that this takes practice, so don’t expect to use this method as the sole defence against ghasts. The player can also deflect the fireball by hitting it with an arrow, a snowball or even an egg.
- The classic defense is to build a mini-shelter out of cobblestone, 3 blocks high with a ladder to let the player poke their head (and bow) over the top, and preferably a 3×3 roof two squares above that for protection. Note that if the ghast can’t see you, they don’t fire.
- If a ghast does come into reach the player can also hit them with a sword. This can happen when they spawn in a cave, or just randomly fly into one, or happen to fly close to the ground. Besides this being a rare opportunity, you may also need to dodge or bounce fireballs at close range.
- If there is more than one ghast attacking the player, the best option is to run and/or hide. If the player sprints, fireballs cannot hit the player. If they can get out of sight from all but one, they can then focus on shooting down that one.
- Ghasts don’t spawn in crimson forests and warped forests. On the contrary, you may want to avoid soul sand valley biomes as ghast spawns are abundant there.
Fighting Hoglins[[[[]
Hoglins have high health and a lot of knockback resistance. However they can be burned, and they fear warped fungi. Some ways to get away from them are:
- Let the piglins kill it.
- Use warped fungi to scare them, and hit them as they are retreating and don’t attack you.
- Burn them with fire or lava.
- Dig a 1-wide hole on the nearby wall and hit them from inside.
- Sprint/critical hit them.
- Spam click to knock them back while damaging them.
- Build a 4 block pillar to kill the hoglins with a ranged weapon, or dump lava on them.
- More risky, build 3 blocks up and crouch to melee attack them. However, Hoglins can still occasionally get you from this height and knock you off the pillar. If you are not on a flat area, they can get up on another block enabling them to hit you. Always examine where you are building up.
If there is nothing around to scare off a Hoglin and your armor is low, you are best using ranged weapons or fire to kill Hoglins.
Resources found in the Nether[[[[]
- Netherrack, soul sand, gravel, lava, magma block, glowstone, nether quartz ore, soul soil, blackstone and its variants, nether gold ore, basalt, crimson stem, warped stem, are all freely available. Note that while the player can pillar-jump to mine a high glowstone formation, a little exploration may reveal more accessible blobs of the stuff (look for places with low ceilings).
- Crimson and warped fungus are found in crimson forests and warped forests
- Red and brown mushrooms are likewise found scattered about.
- Ghasts sometimes drop ghast tears and/or gunpowder.
- Magma cubes can drop magma cream.
- Zombified piglins sometimes drop rotten flesh and gold nuggets. They can drop golden swords and gold ingots. However, attacking these is unwise until the player is prepared to handle a lot of them.
- The player can also mine nether quartz, used for advanced redstone components, and decorative purposes as well. Fortune is a true gift here.
- Obsidian can be farmed with nether portals. View the nether portal for more details (the diamond pickaxes needed to mine these can rarely be traded for emeralds by some villagers, making them renewable).
- Blackstone can be used as a substitution for cobblestone in the Nether, or as a good building material.
- Nether gold ore can be mined to get gold nuggets, which can then be crafted into gold ingots.
- Ancient debris can be used to craft netherite items.
Once the player finds a nether fortress, they can obtain several other resources:
- Nether bricks, nether brick fences, and nether brick stairs. These are ghast-resistant and non-flammable building materials. They can also be crafted from smelted netherrack, but that takes some time and effort. The nether fortress is made of nether brick, including those massive support pillars and all the decorative fencing.
- Nether wart, which the player can grow on soul sand. The player can also grow it back in the Overworld, provided they brought back some soul sand.
- Blazes drop blaze rods, and are the only source of them.
- Wither skeletons occasionally drop their skulls, which can eventually be used to spawn the wither. They also provide coal, and bones (bone meal for plants).
Once player finds a bastion remnant, they can obtain several other resources:
Piglins can be bartered with for a variety of resources:
- Blocks: Blackstone, Crying Obsidian, Gravel, Obsidian, Soul Sand
- Materials: Ender pearls , Leather, Iron nuggets, Nether bricks (individual bricks), Nether quartz, String and Water bottles
- Other useful items: Fire charges, Potions of fire resistance (regular or splash), Spectral Arrows (regular arrows in Bedrock Edition), and boots or books with Soul Speed.
Exploring the Nether[[[[]
When exploring the Nether, there are a few things to remember:
- Hostile mobs are common, and can spawn anywhere there is space. Luckily, what are perhaps the two most dangerous Nether mobs – ghasts and blazes – have special spawning needs. Ghasts require a 5*4*5 space to spawn, free of transparent blocks and slabs and spawn rarely in nether wastes and basalt deltas, but quite commonly in soul sand valleys. Blazes spawn only in nether fortresses, and only below light level 12. Zombified Piglins are common as well—while they start out neutral, they can easily get in the player’s way so that they accidentally attack them, and they spawn only in nether wastes, crimson forest and nether fortresses.
- Wear a piece of gold armor if possible, because if you don’t wear gold armor, piglins attack you.
- Be generous about laying down cobblestone paths and putting up ghast shelters preemptively. If you need more cobblestone, go back to the overworld and get more.
- You can actually use the netherrack you mined to make nether bricks, smelt it with lava which is plentiful. This is time consuming, but nether bricks are as good building material as cobblestone, and it’s plentiful. You could actually make an automatic smelting facility to cook your netherrack.
- You can also use Blackstone for alternative block, especially if you’re in basalt deltas.
- If you die in the Nether, you respawn back in the Overworld (Unless you use a respawn anchor, which you can set your spawn there). As long as you stay in the Overworld, Nether time is frozen. In particular, you can take all the time you want to re-equip yourself and plan; when you do go back, if you can get from the portal to your death site within 5 minutes, you may well be able to retrieve anything not lost to fire, lava or explosions.
- If you’re playing in multiplayer, this may not apply – if there are other players nearby in the Nether, they can keep the chunk loaded and the clock running. Also, they might save and/or steal your items!
- Even in single player, if the Overworld side of the portal is loaded, it can spawn zombified piglins, which may wander through the portal. Every time they do this, the Nether side of the portal is loaded for about 15 seconds — not very much, but if you spend *too* long before heading back, it can add up.
- If you use a respawn anchor to respawn in the Nether, you need glowstone to charge it, and it requires rare crying obsidian to craft it. You can get crying obsidian from bartering or mining them from ruined portals.
- Navigation is tough. Where the in-game methods below fail, the debug screen may be helpful, as it provides your coordinates and direction, or if you have a lodestone and a lodestone compass(normal compasses spin wildly), you can find you portal easily by putting the lodestone near the portal, then link the compass.
- Normal compasses and clocks spin wildly (although the day/night cycle continues while in the Nether), and maps made in the overworld don’t work either.
- Use lodestone compasses for navigation in the Nether, which require lodestone crafted from a netherite ingot and chiseled stone bricks.
- You can activate a blank map dans the Nether, and use a crafting table to zoom it out a bit. However, such a map shows only the bedrock “roof”, and the direction indicator spins randomly, so it’s not nearly as useful as an Overworld map. On the other hand, it does give some idea of where you’ve explored, and the marker is in the correct location on the map. While maps are not centered exactly at their creation, you can put framed clones of the map on your portals to make those green markers appear in the correct locations.
- When exploring, try to keep going in one direction until you reach an impassable obstacle (wall, cliff, lava lake), and leave a trail of markers along the path from your base, so you can easily find your way back. Dirt and torches are recognizable, but jack o’lanterns let you point the direction to your base (all the above are vulnerable to ghast fireballs, but unlike torches, Jack o’lanterns remain if the netherrack supporting them is blown away.) Cobblestone arches (as well as any paths you’ve made) also work well as they resist Ghast fireballs, are easily distinguishable from surrounding netherrack, and can be positioned so that passing through them orients you to the direction you came.
- Tunneling through netherrack: Making a 1×2 tunnel is a sure way to get killed by lava. Instead dig a 2-wide tunnel with the floor of the left side one block lower than the right, or vice-versa. This makes a trench for the lava, and if you’re standing on the high ground, the lava does not touch you. Staircases are trickier: When digging down, lava can appear below or in front of you and can be bucketed or blocked off. When digging up, dig 2-wide, and regularly put 2-long areas with a one-block pit in front of the next step. This gives you someplace to dodge flowing lava, and the pits capture the flow. Also, watch out for lava “drips” when mining upward. Ladders or signs can also help block lava until you have a chance to do something about it.
- And again, the debug screen provides your coordinates and facing—this is also helpful for choosing where to place a new gate back to the overworld.
- Normal compasses and clocks spin wildly (although the day/night cycle continues while in the Nether), and maps made in the overworld don’t work either.
- This cannot be restated enough: be sure to build a base. This way, if you accidentally attack a mob of zombified piglin or have a ghast on your trail, your base must protect you, and consist of more than just an exposed nether portal. Again, as ghast fireballs can blow large holes in netherrack walls, you should construct your base out of cobblestone, stone, or, for a decorative look, stone bricks. Not only do these blocks have the necessary blast resistance to withstand a ghast fireball, they also are not found naturally in the Nether. This makes it much easier to identify your base from a distance.
Nether fortresses[[[[]
One of your main objectives in the Nether is to locate a nether fortress. To see all the features of the nether fortresses visually, try this video “here”. Basically, their straight walkways and tall pillars are unmistakable but may be dimmed by distance. Be sure to look carefully into the abyss beyond the edges of the areas you explore; if you’re not using Far render distance already, you can occasionally switch to it to see farther. If you do not see any, remember that the lava seas that generate in the Nether allow the player to spot more land, and a saddled strider can help in this regard. Be aware that sometimes most of the fortress is engulfed in netherrack. Therefore, open your eyes and look for signs of fortress-like nether bricks, blazes, and wither skeletons.
Even after spotting one, you may well need to find a way to get to it, or even build a bridge to it. (Suggestion: three-wide cobblestone, with two-high iron bars or nether brick fences for railings, and a roof. Those ghast get really annoying when you’re out on a bridge… you might even put in a couple of turrets for sniping at them, too.)
Once you do find one, it is a good idea to make sure you have the necessary supplies to gather its many resources. So, head back to your base, or even back to the Overworld, and get, at a minimum, a stone pickaxe, an iron sword and lots and lots of food. An enchanted golden apple is handy when it’s time to take on a blaze spawner, but you may want to stash that nearby and go back for it when you actually find the spawner. Trading with piglins can also get you potions of fire resistance before the fight.
Lots of walls of any non-flammable material or nether brick fences are handy too: safety railings on the walkways are really nice when ghast starts taking potshots at you and blocking off unused areas and broken bridges helps cut down on fights.
There are a few things that are of the utmost importance when exploring a nether fortress:
- Explore the nether fortress thoroughly. You might not find much, but every once in a while you can find nether wart plantations, which usually generate behind staircases, or a blaze spawner. These are your key prizes, as the only places you can find these are in the nether fortress, or in bastion remnants, which is both rarer and more dangerous. Details on nether wart farms can be found on the nether wart farming page.
- Wither skeletons are scary but they can’t go through a 2-block high passage.
- When exploring a nether fortress, always place torches to your right – that way when you want to get out you just make sure that the torches are on your left. Jack o’lanterns make this even simpler — always face them toward the exit (or where you need to go to reach said exit).
- If you come across a nether wart plantation, collect as many (if not all) of them as you can, as nether wart can be used to brew awkward potions——the base for most potions, then replant the plot (you’ll have plenty leftover). Then go back to your base and create a nether wart farm by planting it on soul sand. Nether wart doesn’t care about light or water and grows in the Overworld and The End, so you can take the farm back to your overworld base. Note that you don’t use all that much, so four to six blocks of soul sand support a brewery and then some. You can use excess nether wart to trade with Cleric villagers and get a couple extra emeralds, which is better than throwing them away or hoarding them.
- You may well want to build a portal leading back to the overworld from the nether fortress. Having an Overworld base handy provides all the supplies you need.
- When you find a blaze spawner, you have a choice: turn it off, or farm it. There are usually at least two blaze spawners per nether fortress, and if multiple nether fortresses have joined together there may be more. So, don’t assume the first one you find is your only option, but you do need to fight blazes at least once “the hard way” if you didn’t get a fire resistance potion by bartering (enchanted golden apple notwithstanding). That first fight may be fairly tough, but together with the nether wart, you gain the means to make potions, including potions of fire resistance. Celles make return engagements much easier.
[[[[]
The way to navigate through a nether fortress needs torches. When you finish a part of the nether fortress, put a torch at the entrance of the room to help you explore the nether fortress easily. Or you could block off the entrance with a certain block (like cobble). Wither skeletons can give you the Wither effect——a health draining status effect made by both a wither projectile or wither skeletons hitting you. Blazes are extremely dangerous and can be in the hallways and rooms, so make sure you are aware of that.
Closing a blaze spawner[[[[]
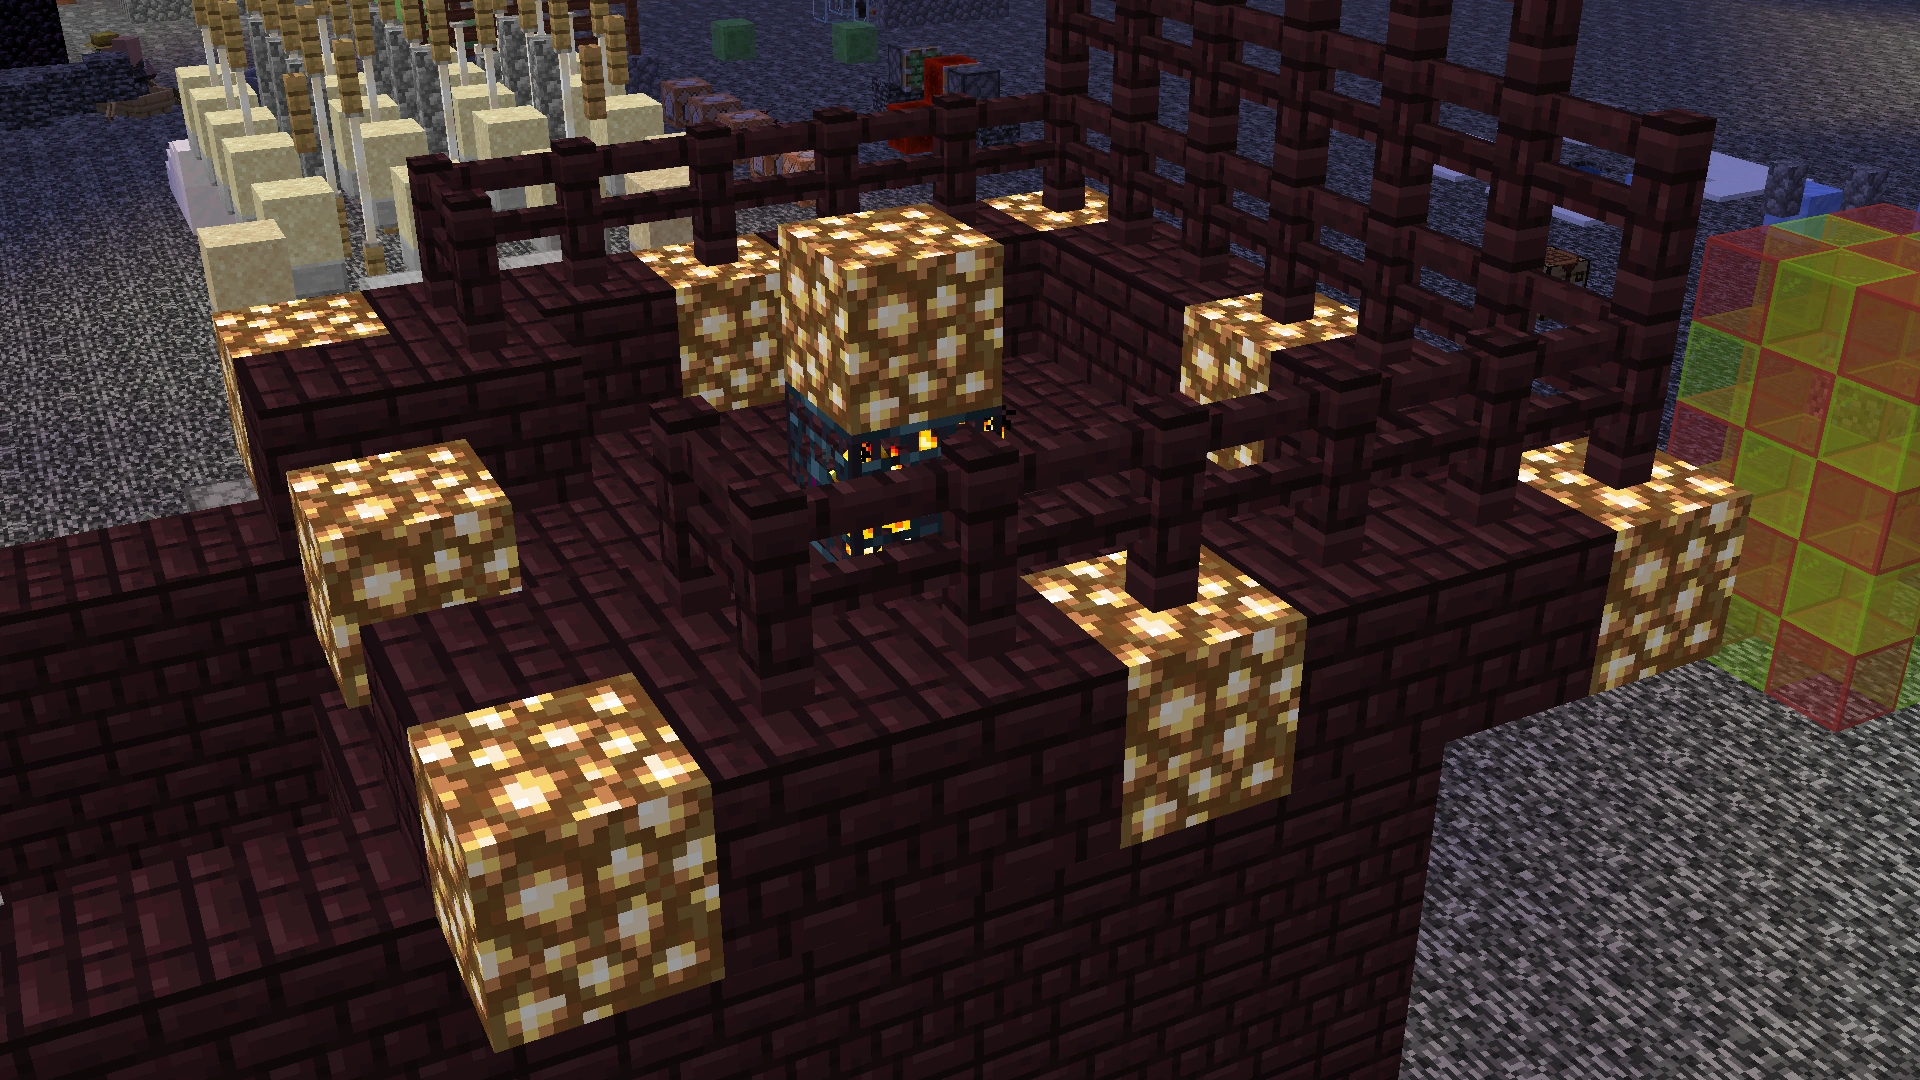

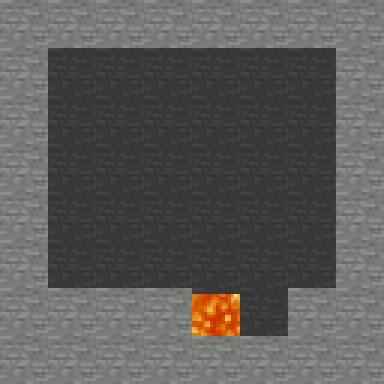
The lighting pattern shown in a 3D image. Notice the additional light block above the spawner.
While a blaze spawner can be destroyed as usual with a pickaxe, you probably shouldn’t do that unless you’re sure you’ll never, ever, want to hunt there. Blazes can spawn up to light level 11, up to 4 blocks away from the spawner (and a block above or below it), so simply placing torches on the spawner doesn’t stop them from spawning. You’ll need to plaster the area with a mix of jack-o-lanterns (or glowstone, shroomlight).
This lighting pattern should suffice to squelch a Blaze spawner: (Top view, all on the same level.)
An additional light block is needed above the spawner, as shown in the 3D image. If the area around the spawner is to be cleared, another light block is needed below the spawner as well.
Farming a blaze spawner[[[[]
There are many hints for fighting blazes on their page. Here are some useful ideas:
- For your first fight, kill blazes that are not in the spawner room. This lesser number of blazes are easier to fight when you don’t have a potion of fire resistance.
- If you haven’t brought out the enchanted armor, now’s the time. Fire Protection and Protection are both helpful.
- An enchanted golden apple is good to bring, but if you haven’t acquired one yet potions can act as a substitute. Specifically, potions of fire resistance, strength, and regeneration can be a huge help. Although Potions of Fire Resistance make you immune to blaze fireballs, you are not immune to their touch attack. Armor and regeneration potions can help.
- An iron golem may be helpful, especially once you’ve got the spawner contained. One big disadvantage is the golem’s huge knockback, which can throw Blazes and their drops out of reach. The golem’s distractibility is also an issue — between spawnings, they’re liable to wander off after zombified piglins and wither skeletons. The zombified piglins don’t mob you or the golem for the golem’s attacks, but the repeated fights soon wear down the golem. (A splash potion of regeneration or repairing the iron golem with iron ingots can help with that)
- A creative option is to mine under their platform to make a bolthole with a narrow opening up to their platform, perhaps 1×3. As they descend into the hole to reach you, you’ll be able to get in several hits before they can respond. Nether fortress stairways (the narrow sort, not like the one leading to the Blazes) can provide a similar bolthole.
- A fishing rod can be useful for pulling blazes into melee range so their drops aren’t lost.
- Create a “ceiling” above the spawner-this prevents blazes from flying out of reach and makes it easier to obtain their rods.
- It takes 7 snowballs to kill a Blaze. Water can’t be used in the Nether, as it simply fizzes and vanishes. You can try making a Snow Golem, but they’ll quickly “melt” due to the Nether heat. (Again, splash potions of fire resistance can help.)
- With fire resistance assured, you may want to seal yourself in the spawner room, so that wither skeletons, magma cubes, or other Blazes can’t ambush you from behind.
- Bring a shield to block the fireballs.
Living in a nether fortress[[[[]
If you’ve mastered the Nether, you can go in and start making a nether fortress more habitable. If you can have control of a nether fortress on a multiplayer server, you can control who enters the area, and also control who gets blaze rods (as blazes spawn only in nether fortresses). Mine down most (if not all) the netherrack covering the fortress. Make any surface where you don’t want mobs with trapdoors or slabs. With the addition of nether quartz, the one who controls a fortress can also control who gets nether quartz from the area.
First, you should repair any bridges, as this can prevent falling deaths in the nether, though it gives mobs more access to the nether fortress.
In many places, lava may be leaking in, so it is advisable to close off the area.
Almost all forts have a single roofed, large building, which you can use as the main building, where you can store all the necessities. You should put doors on the building, to prevent destructive mobs from entering.
DO NOT make a bed, beds explode in the Nether and the End if you sleep on them, though crafting tables are needed, and an ender chest might be useful (if one leaves the Nether in a hurry, they can get their items via another chest). Use a respawn anchor instead.
You should disable blaze spawners, so you can use them for mob grinding purposes later on, but also prevent blazes from overrunning the nether fortress, as they are extremely hazardous.
Some parts of a nether fortress have been filled in with netherrack and it can be a pain to dig it out. TNT is useful, though this risks damaging the fort, creating more hassle for the user. However, digging netherrack can give you a good source of nether bricks——a good source of building material back home in the overworld.
Nether wart plantations are in most nether fortresses, with many warts in one plantation. They usually generate behind staircases, so keep an eye out when hunting for them. For more about nether wart, see Tutorials/Nether Wart Farming.
If one finds a nearby fortress that is not attached to the first one, nether bricks can be looted to repair the nether fortress if in survival. Large parts of the fortress itself such as the pillars for bridges are solid, and nether bricks can be looted from the inside of these pillars.
Killing the various mobs that spawn there is tricky. Blazes, zombified piglins, and ghasts pose a threat, though wither skeletons are a minor annoyance. Mobs spawn at a faster rate in a nether fortress, and trying to kill all the zombified piglins is impractical, so it is best to just leave them alone, as a large pack of zombified piglins could knock you off into a lava ocean. A few of these mobs can be prevented from spawning at all with proper light levels. Blazes spawn at light level 11 and under and wither skeletons at 7 and other, so lighting up the entire area with torches is recommended. Ghasts need a large space to spawn, 5x4x5 blocks with a solid block beneath them, so light sources should prevent all those mobs except zombified piglins from spawning. The zombified piglins are neutral, so avoid accidentally hitting them and you’ll be fine.
If imported farming does not work, you should use the naturally growing mushrooms to make soup, so you have a bit to eat, though it is preferable to make better food, such as bread, with imported dirt and wheat seeds. This, however, may prove difficult, due to the inability to hydrate farmland in the Nether. Chickens can also be brought in using eggs to provide raw chicken.
Obstacles[[[[]
Lava[[[[]
Lava is plentiful in the Nether, in huge lakes (a sea of lava is near the bottom) rivers, and falling from the ceiling. You must be careful around lava as water buckets do not work in the Nether, and ice disappears instead of melting into water. Also, lava spreads much faster and farther in the Nether than in the Overworld (7 blocks instead of 3). Two good ways of crossing lava are to make a potion of Fire Resistance or eat an enchanted golden apple; while this effect is active, you can swim through lava without taking damage. Fire Protection on your armor can also protect you from lava: if using iron armor or better with the maximum possible protection, you take only half a heart of damage every couple seconds (with higher tier armor reducing how often you take damage), which is small enough that it can be outpaced by the natural regeneration you receive from a full hunger bar. This level can be achieved by wearing 1 armor piece with Fire Protection IV and 3 with Protection IV, or by wearing 2 armor pieces with Fire Protection IV and 1 with Protection IV. Note, however, that this rapidly damages your armor’s durability. This can be mitigated with the Unbreaking and/or Mending enchantments, or completely negated by using Netherite armor, which doesn’t lose any durability from fire and lava damage. It also uses up food as you’ll need to keep eating in order to keep healing, so it’s not as suitable as a Fire Resistance potion for crossing large bodies of lava, but it does remove the danger of dying from accidentally falling into lava without having to constantly drink potions “just in case.” Fire Protection also has the side benefit of reducing the amount of time it takes for you to stop burning if you catch on fire from the lava. If any lava is in the way of your builds, simply clear it out using a bucket or fill it with blocks, and then continue on.
If you can find and reach a lava flow’s source block, you can bucket it just like in the Overworld. Unfortunately, in the Nether, much of the lava is pouring down from great heights. Normally, use cobblestone, or iron bars to contain lava or direct it away from you (if you use flimsy blocks like dirt or netherrack, a ghast fireball can undo your work in a moment!) As always, if you mine upward, then watch for dripping red particles (if you have particles turned on). The drip itself does no damage, but if you mine a dripping block, lava pours down. If you wish to get rid of lava flowing from the ceiling (in your way, or immediate hazard), you must block jump up to the source (or simply aim at the ceiling), and cover the hole with any non-flammable block (if it’s flowing straight down from a flat ceiling, you may need an extra block next to the flow to place the dam). One must be extremely careful about the placement of the block, however—if misplaced, the block can just spread the lava wider.
You can ride a saddled strider and control it with warped fungus on a stick to cross a lava ocean. Make sure you know how to get back, though. Lava oceans are sometimes big and easy to lose direction in. If you want, you can drink a combination of Night Vision and Fire Resistance potions while exploring lava seas, because you can swim across lava to the bottom to scan the ground for ancient debris, which can rarely generate under lava seas.
Zombified piglins[[[[]
Zombified piglins are common in the nether wastes and roam in packs of 4-10, and they also spawn in crimson forests. Before 1.16, Zombified Piglins were instead known as zombie pigmen. They are neutral mobs, meaning that they don’t attack unless you attack them. However, if you attack one Zombified Piglin in a group, the whole group (and any others in a wide range) swarms you like wolves, easily killing any unprepared player. When a Zombified Piglin is attacked, all others in a wide range (33 to 55 blocks horizontally and 10 blocks vertically) of the victim become hostile and give chase if you are within 40 blocks of them. This can be avoided if you kill the zombified piglin in one blow, but that’s easier said than done. Do this by using a diamond sword enchanted with Smite IV or above and a critical hit. They can see you only in a 40-block radius — any Zombified Piglins between those distances are turned hostile, but do not move toward you (instead of wandering as normal) until you come into sight. This can be a nasty gotcha: When you defend yourself, any zombified piglin within a Nouveau 33 to 55 block range become enraged. As of version 1.8, Zombified Piglins forgive you over time if you leave them alone for 20 to 39.95 seconds, although if you are still within their 40 block pursuit radius, they continue to attack. If you really need to get gold from them, stand on a two-block high pillar in an open space and then kill them. However, Piglins and Ghasts get really annoying on the platform.
It is usually better to leave these creatures alone, but if you want gold nuggets, or you want to increase your level (killing many zombified piglins gives you a lot of experience), you can sarfely attack the zombified piglins in various ways. Also, if you have to fight Zombified Piglins, make sure there isn’t much (or even better, no) lava or fire surrounding you. You may have to move around a lot to fight all of them at once, and distractions make it worse (also, you may need to collect your stuff after getting killed).
Note that Zombified Piglins wield and carry golden swords, which can sometimes be enchanted, but they usually drop only rotten flesh and gold nuggets, only rarely dropping gold ingots or their swords. Their swords can sometimes be enchanted, with the level of the enchantment varying depending on the difficulty.
- Build a killing ground– Near a large group, fence/wall off a controlled area, and set up gates, one-way doors, and suchlike so that you can limit them to approaching one or two at a time, and block them off altogether when needed. Don’t forget an escape route! Note that this can be much more difficult as of 1.8 as they now have path-finding AI.
- Bow and arrows– Using a bow, you can pick off Zombified Piglins one at a time at a safe distance. Just make sure you have enough arrows and they don’t get to you——Zombified Piglins run faster when provoked, so being in high ground is a good choice.
- Separation– Isolate the Zombified Piglin and kill them, but make sure they are far away from any other Zombified Piglin, or else they attack. Time-consuming, but safer than the bow-method. This is no longer as effective as of 1.8 since their anger radius has been vastly increased, though if you stay away long enough they forgive you.
- Nether portal – Mobs can travel through portals. So, if you can push or lead them into a portal, you can follow and deal with one or two at a time in the Overworld. Some Nether mobs, especially Zombified Piglins, can spawn inside portals, so they can be teleported into the overworld. If you attack a Zombified Piglin in the Overworld, it makes no impression on ones in the Nether.
- Diamond/netherite sword, iron or better armor, and full hunger bar– If you have a diamond sword (preferably enchanted with something like Knockback, which help for fighting groups), a full set of diamond or iron armor, and you are regenerating, you may be able to beat the whole group. NOTE, this is not recommended as, if you die, you could lose a diamond sword and a full set of armor. It helps if you staged the fight somewhere away from lava and close to your spawn portal. DON’T FORGET: they may pick up your armor and/or weapon if you die! If your armor has Protection 4, however, this becomes much safer as the protection greatly reduces damage. However, still be aware that they can knock you into lava, fire, or off a cliff.
- Healing splash potions – One splash potion can heal you for 6
 HP, and also damage the Zombified Piglin(s) by the same amount. So you need 3 potions to reduce them to 2 HP, or 4 potions to kill them.
 - Cacti– It is possible to create a cactus fence in the Nether by placing some sand and cactus blocks. You can then bump into zombified piglin to push them into the cacti until they die and drop items. If you are careful not to actually attack them (no clicking!), the nearby piglins stay neutral.
- Iron Golems– When an iron golem attacks a piglin, that piglin does not strike back. Also, they kill the piglins in 2-3 hits and usually aren’t hurt at all. This tactic works better if you have a lead. If your Overworld portal is in a village, then you can easily drag golems into the Nether when need be.
- Tower– Just build a three-block high tower to stand on, and the piglins cannot jump to reach you. Don’t do this near ghasts; they can blow you off your tower.
- Bed Bombing– Place down a bed and blow it up. Remember to have a block in between you and the bed, otherwise you may kill yourself too.
Ghasts[[[[]
As mentioned earlier, ghasts shoot deadly fireballs at you when you’re in their sight of 100 blocks, so stay alert for incoming fire any time you’re in the open, or exposed to open space. Their noises, which sound like crying babies, can give some warning, but their fireballs travel even farther than their sounds, in fact the fireballs travel for one minute before despawning (or until the ghast is dead)., so this isn’t a reliable warning. Cobblestone resists the fireballs, which is why you should bring a lot.
However, ghasts can give you trouble with zombified piglins around! If you bounce back one of their fireballs, the fireball now counts as your attack, and if a zombified piglin so much as gets touched by the blast, it becomes provoked (along with all its buddies in and out of sight).
Pro tip: when the fireball is within the player’s reach, aim at the Ghast and punch. As long as the fireball is in your FOV you can hit the ghast. NOTE: If surrounded by multiple ghasts, constantly hitting attack while aiming at a Ghast throws all fireballs in that direction, regardless of which direction they are coming from (they still need to be within reach). Do be careful, however, with bouncing fireballs back at Ghasts on the ground, as the explosion from the fireball can not only damage the vicinity, but provoke zombified piglins as above.
Remember that unlike shulker bullets, ghast fireballs do not follow the player. If you are in a difficult situation, just run to a safe place. You can always outrun the impact area.
- Bow And Arrows– Simply run to a safe place without other mob distractions and finish it off with a bow & arrows.
- Sniper Turrets– If you are crossing a bridge over a lava sea, build sniper turrets . They consist of walls with holes on them. Fire arrows or charges at ghasts from the turrets and quickly duck behind a two-block-tall wall when the ghast fires at you.
Blazes[[[[]
Although they cannot be found in the “general” Nether, blazes can spawn in nether fortresses, both naturally and through spawners. For the first run, it is strongly recommended to find an enchanted golden apple. As of the new Minecraft 1.9 update, these can no longer be crafted but can be found in chests in various locations: dungeons, desert temples, mineshafts, and woodland mansions. Failing that, loading your armor up with Fire Protection and Protection enchantments can help; maximum protection comes with 10 levels total of Fire Protection, with each two levels of regular Protection counting as one of Fire Protection.
After that first run, your first two blaze rods (and some nether wart) let you brew potions of fire resistance; use the first one to make a brewing stand, then craft the second into blaze powder. The first piece of blaze powder fuels the brewing, the second can make magma cream if you haven’t picked any up yet, but if you do have some it can be used to make Potions of Strength (with a bit of redstone, your potions last even longer). At this point, you can run away and come back with potions of Fire Resistance. This makes you completely immune to their fireballs, and if you keep a block or so distance, you can avoid their melee attack.
Once you’ve gotten more comfortable with the blazes, you can build one of the spawners into a farm, by casing over the spawner area with nether brick fence, and digging a hole underneath for the blazes to slowly descend into.
Magma Cubes[[[[]
Magma cubes are slime-like mobs that spawn in the nether wastes and spawn abundantly in basalt deltas, generally near lava (hence the name magma cube). They look like burnt slimes with yellow eyes, and seem to have springs under them (they jump fairly high and the “springing” is visible). Their properties are much like slimes, as killing a large one results in it splitting into 2-4 medium-sized ones, which splits into 2-4 small ones. The large and medium Magma cubes have a chance of dropping magma cream and experience when killed. You can prevent magma cubes from spawning in your base by making the floor out of transparent blocks. As mentioned earlier, you can stand on a pillar to kill magma cubes, but any ghasts or crossbow-wielding piglins might really annoy you.
Wither Skeletons[[[[]
Wither skeletons are tall, darkened skeletons, wielding stone swords. They inflict the wither effect for 10 seconds with a hit. They walk when idle, but sprint toward a player when they see one. However, they can’t pass through a two-block-high space, which makes them somewhat easy to deal with. They drop bones, coal, and occasionally their stone sword. They also have a small chance to drop a wither skeleton skull, which are essential to summoning the wither boss. These types of skeletons are found only in nether fortresses. They can roam in groups in fortress hallways, so be careful of blazes and being withered in this situation. Knockback is good for packs where you want them as far away as possible.
Piglins[[[[]
Piglins commonly spawn in Nether Wastes, Crimson Forests, and in Bastion Remnants and are armed with either golden swords or crossbows. The adults are by default hostile, but if you have at least one piece of gold armor on they become neutral toward you, and the babies are always passive. Throwing a golden item at them pacifies them for a moment. When killed, they have a small chance of dropping their golden sword or crossbow, any armor they naturally spawned with, and they drop any picked up items. If you barter with them by throwing or using[1] a gold ingot on them, they throw something back, as seen on the bartering page. You can prevent them from spawning by thoroughly lighting up the area as they spawn at light levels 11 or below. They also run from soul fire related blocks and zombified piglins. If they go into the overworld through a nether portal, they start to shake and turn into zombified piglins shortly after.
Hoglins[[[[]
Hoglins are large pig-looking mobs, which drop raw porkchops, leather, and experience upon death. They spawn in Crimson Forests and Bastion Remnants. They are naturally hostile with 40 health points. They run from warped fungus, nether portals, and respawn anchors. They run toward players and fling the player into the air upon hitting. Unlike most hostile mobs, hoglins can be led with leads and bred with crimson fungi. If they go into the overworld through a nether portal, they start to shake and turn into a zoglin shortly after. Hoglins make good sources of food when you run out of them in the Nether for long periods of time or if you get lost.
Brewing[[[[]
Many resources in the Nether are essential for brewing potions:
- Blaze rods, from killing blazes, are needed to make a brewing stand, where all potions are brewed. They are also required for making an eye of ender (making the rod into powder), which can locate an End portal.
- Nether wart can be found in nether fortresses or bastion remant and is used to brew the awkward potion, the base for most potions.
- Blaze rods can also be crafted into blaze powder, for strength potions, and fuel for the brewing stand.
- Magma cream is dropped from killed magma cubes, and can also be crafted from blaze powder and slimeballs. It can be used to brew fire resistance potions.
- Gold nuggets dropped by zombified piglins and also when mining gilded blackstone and nether gold ore, can be used to make glistering melon slices, for healing potions, and golden carrots, which is one of the best kinds of food in Minecraft and can also be used to brew night vision and invisibility potions.
- Ghast tears drop from killed ghasts, and are used to brew regeneration potions.
- Glowstone dust is mined in the Nether, and used to increase potion potency (e.g., from poison to poison II).
- Gunpowder is used for creating splash potions.
- Piglins can give you water bottles when bartering.
Settlement[[[[]
Turns out it wasn’t enough for you to explore the Nether. You’ve decided it looks like a nice place to live (or if you’re in a multiplayer world, perhaps you seek strategic control of the rapid-travel capability). So, what do you need to survive here?
Crops[[[[]
You can start by importing some dirt to grow plants. You can even use a hoe to till it into farmland, but there’s a catch: With no water available, you need to till the ground, then plant your seed immediately, before the farmland reverts to dirt. Likewise when harvesting wheat, replant immediately and keep the hoe on your hotbar. This works for all the farmland crops: wheat, melons, pumpkins, carrots and potatoes and beetroot. Melons would be the most reliable as after the stem is fully grown, hydration does not affect the rate at which melons grow. Wither skeletons can provide bones for bone meal to speed this process. Cocoa plants are farmable on jungle logs as usual, so that gives you cookies too. You can also farm sweet berries. While you’re at it, you can layout a few blocks of soul sand for a nether wart farm.
Mushrooms[[[[]
It is also possible to build an 8 by 8 platform, plant mushrooms on two opposite edges, and then use bone meal. This can provide you with a steady source of Mushroom Stew, and you can put torches or saplings in the other corners. On dirt or grass, mushrooms need a light level of 7 or below, but on podzol, mycelium, or nylium, applying bone meal causes them to grow into their respective huge mushroom type at any light level. Nylium is also the only block in the Nether which you can farm mushrooms on, and that is crucial (or alternatively, bring podzol or mycelium from the Overworld).
Generated structures[[[[]
Once you’ve gotten used to Nether dangers, you can invade and repair a nether fortress, as it provides many Nether commodities, such as blazes and nether wart. However, falling is a real danger, as there might be a lava ocean below you. If you’re in survival, and you’ve found multiple nether fortresses (not connected but nearby) you can loot nether bricks to repair your favorite nether fortress. You can smelt netherrack into individual nether bricks, then craft your own walls, stairs, and fences. You can also transform bastion remnants in similar ways. For bastion renmants, block off any lava, and fill in any gaps. Try to fix up the jagged edges of the bridges/walkways. Make the bastion into an bartering farm/magma cream farm. Add decorations and fix up the bastion.
Wood[[[[]
You’ll want wood for tools and torches (and perhaps to smelt into charcoal), so make a tree farm as well. Wood also provide charcoal for torches and smelting. Oak trees also provide the occasional apple for golding, but that’s not really a food supply. If you want Nether woods variants, you can grow Huge fungus as they don’t need dirt, but nylium to grow. Also Nether wood is inflammable.
Another catch: Trees need space to grow – and ghasts need space to spawn. Happily (and contrary to popular belief), ghasts do spawn on blocks, and they need a 5×5 space free of transparent blocks and slabs. You can scatter slabs, glass and glowstone around the floor of your tree farm. You can plant saplings with glowstone adjacent, and slabs on top of the diagonal blocks. You can do this in rows for max efficiency. If you’re low on glowstone, jack o’lanterns and torches suffice. You also need at least 4 blocks of air above the sapling. Using this method of tree farming, you can have a large enclosure for mass wood farming without ghasts! If not too densely lit, your tree farm also serves for bone-meal assisted huge mushrooms, which is useful for Mushroom Stew. The most basic way to safely farm trees is to have a 5×5×7 room with a floor made out of glowstone or glass (if you are using glass, make sure to put torches next to the sapling) and have 1 dirt in the middle of the floor.
Animals and villagers[[[[]
Chickens can also be farmed in the Nether (by bringing in eggs or by killing Chicken Jockeys), but likewise, take space, and warrant anti-ghast measures. There is gravel around for flint and Nether wood for sticks, so with the chickens for feathers, you can make arrows.
Cows, pigs and sheep can be brought through the portal, which can provide you with wool, leather, and meat. Sheep require special measures: You’ll need to get a grass block with a Silk touch tool or killing an Enderman holding one and use that to start grass on a well-lit dirt floor, so they can regrow their wool. You can also just breed the sheep until you have a lot, and then shear some of them and kill the sheared ones. However, the sheep do not re-grow their wool.
Villagers can be brought into the Nether through a portal, either using a boat or minecart. Make sure the portal is protected, so ghasts don’t fireball you or damage the villager. Villagers can use beds without blowing them up, allowing for artificial villages and iron golem farms to function properly. They do run away from zombified piglins even though zombified piglins don’t attack them.
Other[[[[]
Some things can’t be produced in the Nether, and need to be brought in from the Overworld: There are no ores, besides nether quartz ore, ancient debris, and nether gold ore. There is no diamond unless you import it from the overworld or you find it in bastion remnant or nether fortress chests. Emerald, iron, redstone and lapis lazuli are renewable through villagers, and gold is renewable through zombified piglins. Iron is also renewable from bartering, as well as water, though it has to be stored in cauldrons. Coal is renewable from wither skeletons or smelting overworld wood. Blackstone can be used as an alternative to cobblestone. You can get the Pigstep music disc and the snout banner pattern from a bastion remnant, and diamonds and horse armor can be obtained through a nether fortress.
Paper and sugar is crafted with sugarcane, which can’t grow without water. You can get string from killing striders or bartering with piglins. Fishing rods cannot be used for fishing as there no water, but can be used to craft warped fungus on a stick to ride striders or reel in mobs. The same applies to some ingredients for brewing: Besides sugar, there are no spider eyes. They must be brought in from the Overworld. However, the piglins can provide occasional water bottles.
Tips[[[[]
- A player can crouch when near lava as a safeguard to avoid falling in. However, you still get knockback from being hit.
- Mobs such as the ghast can surprise the player, so the player should be watchful of their environment, especially when in bad positions, such as bridging a gap.
- A zombified piglin farm can be created by walling the player off, then killing the piglins through a small hole.
- Killing magma cubes can help the player collect magma cream, which is used for brewing potion of fire resistance, an extremely useful potion in the Nether. One can also get Potion of fire resistance from piglin barter.
- Avoid getting lost in the Nether’s low visibility by placing markers, such as torches or jack o’lanterns. Any markings suffice, but make sure they are not native to the Nether.
- The player should be careful on gravel, as gravel can generate with no supporting blocks, making it fall when it receives an update.
- Glass and string block a ghast’s vision, allowing the player to see ghast filled areas without being shot at. This is useful for bases in the Nether.
- Bringing 10 obsidian and a flint and steel (or fire charge) allow the player to return to the Overworld if they become lost. Compasses don’t work in the Nether, unless linked to a lodestone. A respawn anchor charged with glowstone in a base you’ve built will avoid having to find your way back entirely.
- Bring a pumpkin or a jack o’lantern. They can help you find your direction, as the stem on the top of the pumpkin always faces Northwest even in the Nether, no matter what direction the Pumpkin itself is facing.
- As long as there are no ghasts or blazes present, traversing the Nether by mining along the edge of a wall is fast, safe, and efficient, unlike tunneling through said wall, which requires a fast reaction time and/or the constant digging of pits for lava to drain to.
- Wear a piece of golden armor (possibly enchanted) when traversing through the Nether to avoid piglin attacks.
- Or place a soul fire based block to scare them away. Torches and campfires work, but only the soul kind.
- Bring some warped fungus as a defense toward hoglins.
- Know your biome: Knowing the threats of the biome you’re in can be invaluable. In Nether Wastes, zombified piglins, piglins, and magma cubes roam, with the occasional ghast or enderman. In Crimson Forests, Piglins, Hoglins, and Zombified Piglins roam. In a warped forest, only endermen spawn. In Soul Sand Valleys, ghasts are abundant, along with skeletons and the occasional enderman. In basalt deltas, Magma Cubes spawn abundantly, along with some ghasts. The lava oceans are home to the striders.
Nether survival challenge[[[[]
If this split may potentially be controversial, do not split until a consensus has been reached.
Reason: Page is already pretty long and more could be added to a split page
This is a challenge where you start in the Nether with nothing and leave. This section assumes you play in a release of the Nether Update. Both Java and Bedrock editions use the same mechanics. There are no impactful differences except that Bedrock mob spawning is different and less stable, and Bedrock Edition has worse loot in chests.
Starting[[[[]
Create a Creative world. Build a nether portal and go to the Nether. Break the nether portal. Usually players start with a respawn anchor and four glowstones. If you are setting your spawn, make sure to right click on it even after it is charged so that you set your respawn point. You can avoid placing nether portals and respawn anchors and set your spawnpoint in the nether permanently with this set of commands:
- /gamemode c
- /execute in minecraft:the_nether run tp ~ ~ ~
- /spawnpoint @s ~ ~ ~
- /gamemode s
Make sure to stand on solid ground before executing /spawnpoint.
In either a crimson forest or a warped forest, obtain around 20 stems. The wart blocks can be broken with hoes faster. You do not need to break them, but they make the landscape ugly if you leave them floating. Make wooden pickaxes and start mining right away. Lava pockets generate at all levels in the Nether, so you could directly mine into lava. You need to be very careful, and if you run into lava, quickly block it off. Blackstone can be found in large blobs from levels 5-28. In a Basalt Deltas biome, it can generate with basalt on the surface. While you are mining, look for some nether gold ore. It gives you gold nuggets, which you should turn into gold ingots. (If you have Silk Touch, you’ll get more gold by smelting the blocks.) With Blackstone, which can be used as a substitute to cobblestone, upgrade to stone tools, and make a furnace. After crafting many bowls, look for brown and red mushrooms and craft mushroom stew. Your priority is to mine any nether gold ore you see, so that you can get one piece of gold armor (most easily boots), so that the Piglins don’t attack you. Continue mining any gold you see, and collect wood and mushrooms for mushroom stew. (You need a bowl, a red mushroom, and a brown mushroom for stew)
Finding a good place to settle[[[[]
There are five different biomes, each with their advantages and disadvantages. Find one to base up in.
- Warped forest
The safest of all Nether biomes, but can be unexpectedly dangerous. Nothing spawns there except for endermen and striders. You need to be careful about the endermen, and make the entrance to your house only two blocks high so that you can run inside and kill endermen if you want to/have to.
- Crimson forest
One of the more dangerous Nether biomes. It’s inhabited by hoglins, piglins, zombified piglins, and striders. hoglins are the best way to get food in the Nether, and piglins are rarely an issue if you have gold armor. Zombified piglins are neutral, and don’t attack you unless you attack them. Because the main use of this biome is to get wood and porkchops, it’s better to base up on the edge of the biome, since there is no need at all to be inside it. Put warped fungus near your house to scare away hoglins, and put soul fires (fires lit on soul sand or soul soil), soul torches, soul lanterns, or soul campfires to scare away piglins. Idle piglins are scared by soul things, and if they are attacking you they do not ignore the soul things. No matter what, whether idle or hostile, they are scared of zombified piglins, so trapping and nametagging a zombified piglin and place it outside your house can scare away piglins under all circumstances.
- Basalt deltas
This is the one of the most dangerous biomes. It is definitely not recommended to base up here. Because of the jagged terrain, magma cubes, and lava, it is easily the most dangerous biome to be in. The only benefit of this biome is easy access to magma cubes for magma cream (for brewing fire resistance potions), and easy access to blackstone (used as a substitute to cobblestone), and an easy access to basalt (no usage other than building). Do not build your house inside this biome, but building it close would do no harm.
- Soul sand valley
This is one of the more dangerous biome. Mobs that spawn there include skeletons and ghasts, however they do not spawn in large packs, so you only occasionally bump into these mobs. Soul fire does twice the normal damage, and skeletons and ghasts can easily overwhelm you. Soul sand also slows you down a lot, which is terrible paired with skeletons and ghasts. However, if you have Soul Speed boots (iron boots enchanted with a random Soul Speed level can be obtained from bartering with piglins), you can traverse this biome a lot easier. The benefits include easy access to nether fossils, which provide a large quantity of bone blocks, and skeletons which you can get bones from. You can also obtain soul sand and soul soil, the latter exclusive to this biome, however soul sand can generate near lava in other places and is obtained from bartering.
- Nether wastes
One of the safer biomes in the Nether. This biome is mainly inhabited by a mass of zombified piglins, but is also inhabited by piglins, more rarely. The piglins are scared of the zombified piglins so the piglins should not be an issue most of the time. This biome is known to be flat and easy to explore, which makes it perfect for building. Since this biome has exposed netherrack on the surface, there is more easily accessible nether quartz and nether gold ores than any other biome. You can build a gold farm, which is extremely useful.
Mob-proofing your house[[[[]
You can prevent any mobs from spawning by placing bottom slabs on your house. Bottom slabs refers to slabs that are placed on the bottom of a block, with one more half-block vertical layer above it. You need to also prevent mobs from entering your house.
Hoglins are scared of charged respawn anchors, lit nether portals, and warped (blue) fungi. This is easiest with warped fungi. It can be planted on any nylium or on soul soil. Soul soil can be obtainable from a soul sand valley. If you break a soul campfire, which can be crafted using soul sand, it drops one soul soil block. Soul sand can be obtained from soul sand valleys or with a 8.5% chance from bartering with Piglins.
Piglins are scared of all soul fire items, which includes lit soul campfires, soul fire, soul torches, and soul lanterns. They are also scared of zoglins and zombified piglins. They ignore all items that usually scare them when hostile, except for zombified piglins, meaning that everything besides zombified piglins only scare idle/non-attacking piglins. Placing zombified piglins in a trap is not normally viable because being mobs in the hostile category, they despawn after the player is outside a 128 block radius. Naming a zombified piglin with a name tag prevents this. Keeping idle piglins away is actually useful because opening chests inside your house angers them. The best solution, if you don’t have a name tag, is to just wear gold armor and not do anything to provoke piglins. If provoked, they cease hostilities in 30 seconds if you do nothing to further provoke them.
All other mobs cannot be deterred, but can be easily blocked off.
Mining[[[[]
Gold is the most valuable resource in the Nether. Bartering allows the player to obtain many items and though obtaining a full gold suit of armor does not sound useful, it gives 44% protection and allows the player to take 2x more damage, about. The resources that you must get while mining is:
- Nether gold ore. It drops 2-6 gold nuggets, and attempts to generate 10 times per chunks from levels 10-117 in blobs of size 1-10. It generates 20 times per chunk in basalt deltas, because it can only replace netherrack. Keep in mind that it is still slower to mine in basalt deltas because basalt is slow to mine.
- Blackstone. Mining consumes a lot of stone pickaxes, and stone is needed for all tools, furnaces, and brewing stands. It is found in blobs of up to 1-33 from levels 5-28, generating 2 blobs per chunk. You can easily find more than 33 blackstone in one blob if it connects to other blobs
- Ancient debris. Ancient debris is essential to obtaining netherite ingots and is found in blobs of 1-3 from levels 8-119. A blob of 1-3 ancient debris attempts to generate once per chunk from levels 8-22, and an additional blob of 1-2 ancient debris attempts to generate once per chunk from levels 8-119. It is very slow to find ancient debris from levels 8-119, and better in low places (levels 8-22). It is the most common at level 15
This means that the best level to mine at is y=14, because it covers the most ancient debris, nether gold ore, and blackstone possible.
Disabling mining spawns[[[[]
Most people mine by having a main “hub” tunnel, and having a lot of seperate tunnels that go off of that.
You do not want to have your mines where you are farming mobs. More spawn in your mines and less spawn where you are farming. To prevent this, know where your main hub mining system is in proportion to your base. You need to make sure all of your biomes where you are farming things are outside of your mines. For example, if your base is at X point, and all of your biomes where you farm mobs are south of your base, then your mining tunnels must go north in proportion to your base. That means that your main hub mining tunnel must go between east and west, with the seperate mining tunnels going north, in that specific example.
Farming[[[[]
Bone meal farming[[[[]
A bone meal farm is essential to obtaining mushroom stew through a mushroom farm, and farming trees and fungi. Most vegetation items in the Nether can be composted in a composter, including nether wart, shrooslights, nether wart blocks, warped wart blocks, weeping vines, twisting vines, warped roots, crimson roots, nether sprouts, crimson fungi, and warped fungi. However, weeping vines and twisting vines are the best, preferable twisting vines. Twisting vines and weeping vines can be farmed in a similar manner to sugarcane, with the whole plant growing from a single block. However, twisting vines grow upward and weeping vines grow downward. Farming these vines are quite simple. For twisting vines, plant a lot on the ground. When you need to harvest it, harvest the second block off the ground, to destroy all blocks but the one which the plant is growing from, to save a lot of vines. For weeping vines, it is a lot harder to farm. Ideally, you plant them on the top of wherever you are, and make a platform for you to go up and harvest them (second block from the source block which the whole plant is growing from), and then the plants fall on the ground. You can then use a composter to turn it into bone meal by using it. Most importantly, allow your plants space to grow. They can both grow to a maximum height of 25 blocks.
Vegetation farming[[[[]
Vegetation farming is essential to tree farms, hoglin farms, and strider farms. When you bone meal nylium of any type, it generates vegetation on that nylium block and surrounding nylium blocks. The vegetation includes fungi of both types, roots of both types, and nether sprouts. Certain types of nylium generate more of their color type of vegetation, for example crimson nylium generates mostly crimson fungi and roots, but can generate warped vegetation. The only thing you need to obtain from these farms is warped and nylium fungus, used for breeding animals and growing trees. All other items are only used as decoration. There is no setup for this, but make sure you are doing it on the maximum amount of nylium possible so that there is space for it to generate. If your area of nylium is not wide enough, you can spread it by putting bone meal on netherrack adjacent to nylium. You can also obtain nylium in the Warped Forest, where endermen are often found holding it
Tree farming[[[[]
When a fungi is placed on its corresponding nylium and then fertilized with bone meal, it can turn into a huge fungi. Warped (blue) fungi can turn only into a huge warped fungi if placed on warped nylium (blue nylium), and vice versa with crimson. There is no special setup, but you need to destroy the nether wart blocks (fastest with a hoe), because it needs space to be able to generate a huge fungi. Also, after it grows into a huge fungus, the nylium below it decays into netherrack, and you need to apply bone meal to it, which turns it back into nylium if there is adjacent nylium next to the netherrack.
Mushroom farming[[[[]
Mushroom stew is the easiest food to farm. When bone meal is applied to a mushroom placed on any nylium, it can grow into a huge mushroom. They can be placed on nylium only to be fertilized, and unlike other blocks like dirt, they do not require a low light level to grow. Setup:
- They need space to grow.
- After it is grown into a huge mushroom, the nylium below it decays into netherrack, so you need to put bone meal on it, which turns the netherrack back into nylium if there is nylium adjacent to it.
- The blocks are fastest broken with an axe. They can be hard to reach from the ground, so you can build stairs up to a platform that lets you jump on top of the mushroom.
Mob farming[[[[]
The iron age, after the stone age[[[[]
After the establishing food and wood farms, you can begin the next stage of progression. Next, you need to explore. Exploring is the most essential part to the next step of your progression. While exploring, you need to
- Find a nether fortress. You can find 1-3 diamonds as loot for a 19% chance in both Java and Bedrock, You can also find other loot including saddles, and golden armor, golden swords, golden and iron horse armor. The armor you can wear to be protected against Piglins. You can also smelt it into gold nuggets, and you can smelt the iron horse armor into iron nuggets too. You want to also find nether wart, and in the future, blaze rods
- Mine a lot of nether gold ore. Since this can be found through the Nether, it is definitely worth it to get all of the gold that you can, since it is valuable in bartering. Get any in sight.
- Find a Bastion Remnant. There are four variants, and each one has different treasure. Bastion Remnants can provide a large amount of gold and various items in treasure, including large quantities of iron, arrows, gold, and even diamonds, diamond armor, or diamond tools which can be enchanted. This is definitely worth the exploration since it speeds everything up by a lot
- Find a ruined portal. If you are planning one escaping the Nether, having a nearly finished portal is helpful. The treasure can also be good, including obsidian, gold armor for Piglins, enchanted gold tools, and iron nuggets sometimes. They also have gold blocks near them, which you can’t mine with a stone pickaxe.
- Discover the rest of the biomes. Each biome has helpful things about it, and having access to all of the biomes is extremely helpful.
Next, you want to do bartering with the Piglins. Hopefully, you have around two stacks of gold ingots, which can be a grind to get. You can drop a gold ingot near Piglins or use it on them. They’ll pick it up and drop you a random item.
You are looking for several items in particular:
- Iron. There is a 2.18% chance of Piglins giving you 10-36 iron nuggets, which you can craft into ingots. Since you cannot afford the luxury of making iron tools, your first priority would be to make a shield. Next you need to make an iron pickaxe. The reason for this is that gold blocks generate in bastion remnants, and you cannot obtain them with a stone pickaxe. You cannot afford to make any other tools, but if you have enough you can make a hopper. That makes your total iron to explore a bastion remnant 9 iron
- String. Piglins have a 4.36% chance of giving you 3-9 string. Striders drop string as well, dropping 2-5 string, without Looting on a sword. You need string to craft a bow, which you need for taking down a bastion. You also need it to craft wool for beds for Netherite mining, however that is late-game.
- Spectral arrows (Java Edition only). Piglins have an 8.71% chance of giving you 6-12 spectral arrows. These function like normal arrows, and do the same damage, however they give entities the glowing effect for 10 seconds. That causes a white outline to appear around the target that shows up through obstructions, which is effective in bastion remnants
- Potions of fire resistance/splash potions of fire resistance. Piglins have a 1.74% chance of giving you a 3:00 Potion of Fire Resistance or a 3:00 Splash Potion of Fire Resistance. These are useful for fighting blazes, and useful for lava and fire if you slip by accident.
That’s all you should need for exploring the bastion remnant or the nether fortress. However, you can receive many more good things. Visit the bartering page for more information.
1. Nether Fortress[[[[]
Find a nether fortress and break in. Use the right hand torch rule for exploring. Take the loot from the chests and try to find diamonds. Get nether wart and blaze powder. Make some ender chests and put your loot inside. Have some spare eyes of ender if you don’t yet have silk touch. Avoid blaze spawners, as you don’t have a lot of armor. Kill lone blazes and as many wither skeletons as possible. You need 3 wither skeleton skulls to spawn the Wither. There is no way to craft enchanting tables, so you can only get Looting through ruined portals. When fighting, make sure piglins, other skeletons, other blazes, and endermen cannot get to you when you are fighting.
2. Bastion Remnant[[[[]
Find a bastion remnant. Be careful with piglins. When looting chests, block yourself in or place hoppers under the chests. If you have one, put the loot in an ender chest. Kill the piglin brutes as they aren’t distracted or scared by anything, and will always pursue the player. If the bastion is a treasure bastion, you can get diamond armor, tools and diamonds. Keep raiding bastions until you get enough diamonds.
Once you get enough diamonds, make only a diamond sword and pickaxe. Don’t make the other tools. If you can, make some diamond armor. The next step is upgrading your items to netherite. Make a smithing table and start mining. If you have a strider farm, breed striders and kill them for string. Make as much wool as possible and prepare beds. Go underground, and use beds to blow up areas. 4 ancient debris yield 4 netherite scraps. 4 netherite scraps + 4 gold ingots makes an netherite ingot. Using the smithing table, upgrade your equipment to netherite. Next, find a good place to spawn the wither. It is recommended to spawn it in a large flat area. Reinforce the area with obsidian, as many layers as you want. You should reinforce the base with as much obsidian as possible, just in case the wither flies away and hits your buildings.
Potion brewing[[[[]
Potions are not necessary but vital if you are taking on the Wither. Craft a brewing stand with a Blaze Rod and 3 Blackstone. You need nether wart to brew potions, so set up a farm with soul sand. You also need blaze powder to fuel it. Now, Water Bottles are obtained through Bartering with the piglins. The only way to obtain water bottles in the Nether is through bartering. Piglins have a 2.18% chance to give you a water bottle when bartered with. Using Water Bottles, you could make potions with the ingredients limited to only occurring in the Nether, which include blaze powder for potion of strength, ghast tears for potion of regeneration, glistering melon slice for potion of healing, golden carrots (from various loot) for potion of night vision, and magma cream for potion of fire resistance. You can use glowstone dust to to increase the potency of your potions, however reducing the duration, or gunpowder to turn it into splash potions you can throw, taking less time to use the potion on yourself.
Wither[[[[]
After you got the skulls and soul sand needed, and have picked the place to spawn the wither, place 4 soul sand in a T shape, and place 2 skulls on top, but don’t place the 3rd one until you are ready to fight. Prepare at least a full set of iron/diamond armor with a piece of gold armor. Bring fire resistance, and a netherite sword/pickaxe. Bring a bow with as many arrows as possible. (You can get arrow from bastions, or you can barter for spectral arrows.)
Go to the wither spawning location, and block up dangerous areas with obsidian, including the floor. If you can, fight in a warped forest, as withers attack endermen.
At the start of the fight, fire fully charged arrows at it. Watch out for the skulls and hide to restore hunger/health. If the wither breaks the obsidian, reinforce it. At half health, use your sword to hit the wither until it is dead. Do critical hits to kill faster. Once the wither is dead, pick up the nether star, and prepare the beacon base. (You cannot make the beacon yet because there is no way to obtain glass). Once you have all the mineral blocks you need, build the portal to the overworld. Set up your beacon to show you beat the Nether survival challenge. You can continue on this world and do what you want.
Watch the Nether survival challenge on Pixlriffs’ channel on youtube.
Pixlriffs
Also Watch the Nether survival challenge(Season 2 ) on Binary Vigilante’s Channel on YouTube
[1]
- ?? right-clicking with a mouse or press-hold on touch screen
Source de l’article